Some things:
Polymer clay (I used FIMO Big surprise huh?)
Yellow clay (mine was sparkly)
white clay
transparent clay (mine was sparkly)
Long razor blade (I got mine from a utility knife, be careful it's sharp!)
covered work surface
Oven
Oven mitts

Make a cylinder that is about 2 inches across and one inch thick out of the new yellow you have mixed.

Roll out some white clay to about an eighth of an inch thick and cover each side of every other wedge with it. Keep the top and bottom free of white.

Cover the edge of every uncovered piece in white so that the whole cylinder is white around the edge.

Roll out a piece of yellow clay to about an eighth of an inch thick. Cover the outside edge of the cylinder in a yellow sheet keeping the top and bottom faces free.

Gently start to squeeze the middle of the cylinder. Keep the ends as even as possible as you are squashing it.

The cylinder should start to get longer. keep squeezing and pulling the cylinder until it gets about four inches long. Now you can start rolling it to make it as thin as you'd like.

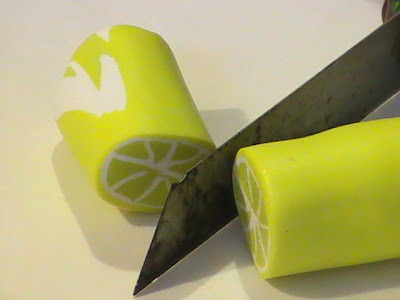
When the cane is as small as you'd like it, check the pattern by slicing off an inch or so from the edge. The pattern will become distorted more at the cane ends and remain truer to the original pattern in the center.

I made limes and oranges (looks more orange in real life, lighting was a bit off) too.
If you are using the canes for nail art, cut them to three or four inch lengths and bake them at 260 for 15 minutes. Let them cool and then slice them thin as paper. It's easier to slice them if you tape them to the cutting surface.
Yeay!!!


No comments:
Post a Comment