Tuesday, May 29, 2012

Bead Making 101

It has been pointed out to me that there are a bunch of folks reading my blog who may just be trying STAEDTLER Fimo polymer clay for the first time. I would like everyone to see how easy and fun it is to be able to make your own beads. If you already know how to make basic beads I have also included a technique for colouring translucent clay that you might not know about.


Here goes!

Materials:
1 56G block of STAEDTLER Fimo effects colour # 014 translucent

Tools:
A rolling tool or a piece of plastic pipe for flattening the clay
Skewers for poking holes in the beads
Cutting tool
a clean protected work surface
an oven
a non food use baking tray


I started by cleaning my hands and work surface. I also covered my work area with a sheet of parchment paper. When I work with light colour clay I take extra care not to contaminate the clay with swirls of dirt. Light clay acts like a dirt magnet and it will pick up oils from your skin and dust from sweaters. A little bit of prep to your work area will keep the colours much truer.
I conditioned the clay by warming it between my hands and kneading it for a minute or two to make it more pliable. 
I rolled the clay out to a 1/2cm sheet.


 I'm kind of in love with my Marsgraphic jr watercolour markers right now and have been using them for everything.


  I decided to try to add some colour to my translucent Fimo by colouring on it with the markers.


 I even coloured a stamp with a black marker and transferred the image onto the clay to see if it would make a difference to the blended clay. It didn't. It was a very cool effect though and I'll experiment with that more later.
I covered the coloured clay sheet with an even thinner sheet of translucent clay. I rolled over it a couple of times with my rolling tool to get rid of air bubbles.


Next I rolled the clay up into a worm shape and twisted and re rolled it until I had a marble swirl effect. happening. 


 Next I made a 1cm thick worm out of the swirly clay and cut sections from it that were about 1cm long.


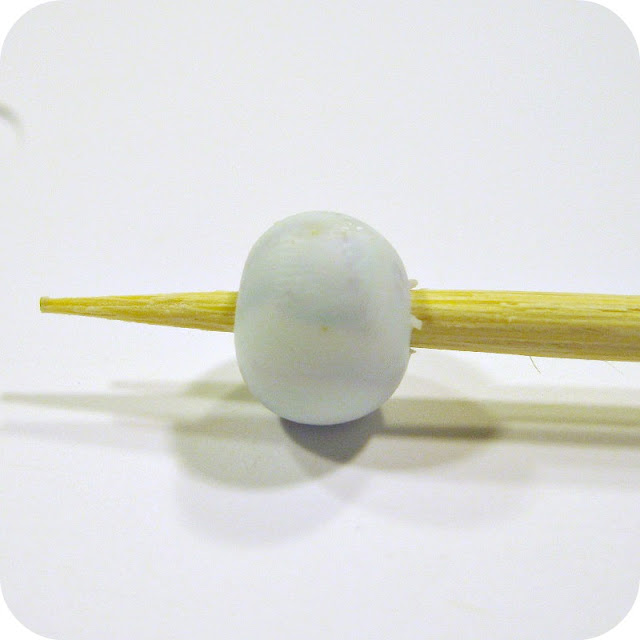
 I rolled the clay sections into little balls and poked the sharp end of a skewer just through each ball.


 Pull the skewer out and put it back through the other side of the bead. Double poking the hole helps keep the beads roundish shape. Poking through one side only tends to make teardrop shaped beads...... they're cool too but they're not what I was going for here.


 I loaded a bunch of beads onto each skewer leaving about two cm clear of beads on each end of the skewer. I put the bead load skewers cross ways onto a baking sheet so the skewer sits on the edge of the tray suspending the bead over the middle of the baking sheet. You can use some kind of tin foil contraption to hold the skewers up if the tray is too wide. Basically what you need to do is to make sure the beads aren't touching any surfaces while they bake. If the beads rest against the baking sheet they will have a flat side.
Bake in a preheated oven set to 260 degrees for fifteen minutes and allow them to cool.


I really like these beads. They're quick and easy to make. It's a cinch to match an outfit. Before you know it you'll be over run with beads! You'll have to call in the Girl Scouts to help you use them all up.

Thursday, May 24, 2012

Steak Supper Cooked Over an Open Fire

It's probably a pretty unusual weekday supper......... But Mom got the fire built and the embers were ready when I got home so I could cook these beauties. A little bit of teamwork is all it took.

Smells just like the cottage did when I was a kid.


Mom made some gorgeous mushrooms and a salad with hard boiled eggs. When I was a little kid I seem to remember someone asking what we all thought the rich folks were eating when we dined alfresco like this.


Don't worry, Sebastian got a few slivers of grilled gristle and maybe even a chunk or two of my precious crunchy fat. How could I resist?

Tuesday, May 22, 2012

Spring Spider Baby Ball

This isn't a post for the squeamish or faint of heart. 
I suggest anyone with a spider phobia (Auntie J)  just not look........... 
But these little guys are soooooooo frackin' cute!


Mr. Jimmy and I spotted this little ball of spider joy hanging off the side of the front porch this weekend. Mom said she's been watching it for a couple days.


This is how far away the wee ones have skittered while we watch them. We saw these ones emerge from the cluster in a dizzying show of speed and agility. 


I asked James to put his hand under the web so I could focus. These little guys are almost too small to get a clear shot.


Here they are without the hand background. I wonder how many of these guys will actually make it out there in the big wide wilderness of our yard. Does anyone know what kind of spider they are?


Monday, May 21, 2012

A Week Full of Flowers

These last few weeks have been busy. I've been working 50 plus hour weeks at the day job and haven't had much time or extra energy for creating. To cheer us all up I've been bringing flowers home and I did manage to get my nails prettied up.

Mr. Jimmy and I had a date and went to see The Avengers. I loved it! I picked up some inexpensive kids nail stickers and slapped them on over some turquoise polish. Not my most creative design... but cheerful.

Mom's got the porch all set up and looking welcoming. There are so many flowers at our house they're even spilling out onto the porch.


Our skid garden is growing well. I'm optimistic about our first food/herb garden in this yard. It's long overdue. 


Our lilac topiary has begun to bloom. I love that the scent blows into the kitchen.


Mom and I went and picked out some pink hydrangea to fill the empty pot in front of the house. We lost a topiary last year so we are looking all lopsided. Hopefully this colourful bush will help. Looking forward to things settling down a bit at work so I can open the summer sewing studio / cottage / garage. I've purged my closet and need to start making some summery clothes or I'm going to have to spend the summer in my jammies!


Monday, May 14, 2012

STAEDTLER Marsgraphic Jr. Watercolour Brush Markers

I've been doodling and trying out some cool markers. They're watercolour markers by STAEDTLER and the set I have comes with a white/clear blending marker. I really like the brush tips these markers have. They keep a fine point but a little bit of pressure gives you a wider tapered line. I get loads of control with these.

The colours in the kit I have are beautiful and vibrant. I hear tell they have a skin tone kit......... I'll have to get my hands on one of those.


Here is the white/clear blending marker in action. The farthest away marker is the black marker. I put down a line with the black marker and blended up with the closer blending tip. I think these are going to make adding depth to my idea book sketches much more fun.

Sunday, May 13, 2012

STAEDTLER Mother's Day Giveaway Winners

Congratulations 
and 
Happy Mother's Day!!!!


I've already emailed Gerrie Johnnic for her info but am having problems getting in touch with winooooona. Please email me at kelliegreason AT hotmail DOT com so I can get your information.

The Happiest of Mother's Days to all of you

Thanks to STAEDTLER for this fabulous giveaway

and Happy Spring!!!

Saturday, May 12, 2012

Things We Stuff Inside Our Tortillas

I mostly add posts about the food we eat so that our eldest can see and reproduce these meals easily when she wants them. She's so very far away and I can't tell you how much I miss her. I know she is fully capable of creating these dishes without my meddling..... I'm just giving her some insurance.

This recipe is dedicated to all the far away family we miss and wish we could spend more time with around the dinner table.

But especially Mercy
I'm going to post a list for the recipe in each picture. Each picture is an ingredient in itself and all of these things together make one of our favorite suppers. 
Here goes....

This is kind of a tomato salsa concoction. We call it tomato salad and we eat it with loads of meals. It goes well in couscous and quinoa salads and sometimes we add baby bocconcini.

It contains:
Red, yellow and orange tomatoes two of each diced
three inches of English cucumber diced
one sweet red bell pepper diced
1/4 of a small Spanish onion diced
two large handfuls of cilantro sliced
one handful of chives chopped (including flowers)
two stalks of celery halved and sliced
salt and pepper to taste
1/4 cup of good olive oil
juice from a ripe lemon
It always tastes better after it sits for a few hours


one pound of ground beef browned
one pound of ground chicken browned
half on a Spanish onion diced 
2 tbsp of olive oil
salt and pepper to taste


1 cup sliced mushrooms (any kind will do)
2 tbsp olive oil
salt and pepper to taste
fry until golden


Teeny pieces of diced fresh hot peppers of some kind
We like to keep them separate because some of us get heartburn


three ripe avocados diced
1/4 cup of sliced cilantro
juice and zest of a lemon
three scallions chopped
half a cup of sour cream
salt and pepper to taste


shredded sharp cheddar cheese


(not a pleasing picture but delicious I promise you)
one can of re-fried black beans heated through


Put it all together or just pick the things you like and smooch 'em on. It's always a great meal and there is something for everyone. 
Make it for Mom she'll love it...... 

but you do the dishes!

Sunday, May 6, 2012

Smoked Pork Chops and Purple Cabbage with Home Baked Bread

We are truly cabbage lovers. Any form is good, Plain old heads of cabbage, savoy cabbage, purple cabbage and even Brussels sprouts are favored here....... especially when paired with a pork product. We have many variations on this dinner in our recipe archives and we've enjoyed every one. Check out the recipe tab above if you're interested.

First we browned some of Krug's delicious smoked pork chops off in a big roasting pan on top of the stove.


Then we removed the chops and browned off two big yellow onions


We add in some chopped purple cabbage and wilted that down a bit


Then we put in a whole bottle of beer. Don't worry folks.... most of the alcohol will cook off so my 1/4 of a beer tolerance level won't embarrass me.


We seasoned it with salt and pepper, added a few bay leaves and a couple of chopped up garlic cloves, topped the whole mess off with the previously browned pork chops and covered it with tin foil. We baked it in a preheated oven at 450 for two hours. Then uncovered it for another half hour of baking.


Here's our bread recipe again. I really like this one and we change it up often by adding different nuts, seeds and grains. This time it's just a basic recipe with flax seed and wheat germ


I made two round loaves and scored the tops to make them a bit crustier.


We've been cutting back on the bread making lately. It's a bit of a diet breaker because of the all consuming aroma it gives off. I simply can't seem to stop at one slice.

Saturday, May 5, 2012

Making a Garden From Industrial Skids and a Kitty Window Flap

Well here we are.... Enjoying the outdoors. Don't we look at ease with our environment? We don't appear uncomfortable without our walls and computers do we? 


We found different sites online (too many to track back to an original source to give credit to the genius who thought this up) and decided it was perfect for our "would rather be playing online than weeding" lifestyle.


All we did was plunk two wooden skids onto our back lawn, staple some plastic to the open sides to keep the dirt in and fill those guys right up with topsoil. It took ten bags of topsoil to fill the two skids. The only tip I can really give you is to make sure you get all the dirt packed right in there. We sat on the grass and shoved the dirt into the cracks with our fingertips. It didn't take very long and was kind of relaxing. Sebastian looked worried. It was a new experience for him to see us all covered in dirt. We'll post progress shots and let you know how it all works out as the summer goes on.

*EDIT*

I wanted to add some progress pictures to this post to make it easier to see how well or badly we did with this skid garden.

This shot was taken roughly one week after we planted. We're watering every day that it doesn't rain after I get home from work. About 6:00 pm or so.


This shot was two weeks after planting. The radishes are doing really well and because of the extra hot weather my girlfriend Marlene has assured me we will have extra hot radishes.


The tulips are all opening in our yard and smell like honey. 


George is terrorizing the neighborhood dogs.


Here is his new cat flap. We made it ourselves. He had shoved his head through the old screen and it needed to be replaced. Mr. Jimmy fitted in a new screen and I modified it to open on cat command.


George was leery at first.........

But decided it was safe in the end. This should make for a much more peaceful house with less meowing to be let in and out every ten seconds.
I still expect to wake up to a raccoon drinking my coffee.
Hope you're venturing outdoors for some new experiences too.