Sunday, November 27, 2011

Meat Birthday Cake!

When making a meat birthday cake, you must always be on your guard. People will do anything to get at it before they are supposed to.


This was a great cake!
I will definitely be making it again.

Here's what you'll need to make one of your own:

One pound of lean ground beef
One pound of ground pork
One pound of ground chicken
Two cups of brown bread crumbs
3/4 cup of A1 steak sauce
Four eggs
One large onion minced
Salt and pepper
Large pot of mashed potatoes
one cup grated cheese of your choice
Half a jar of Presidents Choice Bacon Marmalade
Eight bacon roses
Edible flowers for garnish
Maggs grew us some nasturtium flowers and leaves for this cake. They were peppery and delicious and gave the cake a fabulous colour splash.


I used to food processor to whiz up a couple of cups of brown bread crumbs. These are fresh crumbs, not dried. I don't think it will make a huge difference if you use dried.


I added the meat, eggs, A1 sauce, onions and salt and pepper to the crumbs and mixed it all up with my hands.


Then we split the meat mix into two ten inch round cake pans and flattened out the top with a spatula.


Put it in a 375 degree oven for about 45 minutes. Then pull it out and smear some of that PC bacon marmalade onto each cake top and let it sink in a bit. I put my meat cakes onto a wire wrack to make them easier to get to while I was assembling the cake. You don't want them to cool..... assemble and serve the cake right away.


We used a pizza sheet pan to build our cake. I was worried about the hot meat cake breaking our glass cake stand. Add the first layer of meat and then add all the grated cheese in an even layer on top of it.


Add the second meat layer on to the first and start piling the potatoes op on top of there. Work quickly, it cools down fast.


Use a large cake icing spatula to smooth the potatoes onto the meat cake. It really is just like icing a cake.


I put some potato icing into a freezer bag and wrapped it in a towel so I could grab onto it. I cut a corner of the bag off and used it to pipe icing potato around the bottom and top edges of the cake.


Maggs made some delicious beef and onion gravy and some of our favorite Brussels sprouts. We left the potatoes out.


Now... we just have to figure out how to fit this into a sandwich....

You want a slice?

Bacon Roses

Here is the method I used to make the bacon roses for the top Of Mr. Jimmy's Meat Cake!!!!


Bacon pretty much does make everything taste better and now that I've kicked that pesky gall bladder to the curb, I can pretty much indulge in whatever strikes my fancy.

Does this cake make me look fat?


All you need to make these delicious roses are regular cut bacon strips and toothpicks.


Roll up a strip of bacon.


Stick two toothpicks into the meaty end in a cross pattern as shown. You want the fatty bit to be the top of the rose so the fat cooks off and the rose kind of blooms a bit. You'll see why. If you put the fatty part to the bottom it won't crisp up.


Stand the rose up so it sits on the end the toothpicks are in and roll the edges of the bacon down so they curl. It spreads the little guys out a bit more if you give it a gentle press when your done turning the edge.


Place them on a parchment lined baking sheet and bake them low and slow. I put mine in at 375 degrees for about 20 minutes. I made these before my meat cake and reheated them for serving.

Wednesday, November 23, 2011

Creating a Natural Gel Colour Mix for Nail Bed Extension.

I really enjoyed using the STAEDTLER Karat soft pastel chalks with my acrylic nails. The colours were so intense when mixed with my acrylic powders that I started wondering about mixing the colours together to match my nail bed. Then I started to wonder if they would mix as perfectly with my UV gels as they did my acrylics....... Well, it worked like a dream. Here are the results for those of you that want to lengthen your own nail beds using UV gels. An opaque perfectly matching, easily mixed colour.

Here I'm assuming you already know how to apply and use UV Gels. These instructions are to help you create an opaque matching nail bed colour to suit you.


Things you'll need:

STAEDTLER Karat soft pastel chalks in a range of flesh tones that suit you
Clear UV Gel
UV lamp for curing gel
Nail foil forms
Nail files of different grits and buffers
flat brush for gel application
Gel cleaner
freshly prepped and primed nails


I chose four colours that seemed to match my nail bed colour.


I used my nail file to finely grind some of each colour onto a clean white sheet of paper. I started with the lightest colour and collected each colour in a small reusable plastic container.


The colours don't look very similar here, but when mixed together they should make a pretty close match to my nail bed colour.


In a small light safe container half full of clear building gel start pouring small amounts of powder until you have achieved a colour that you are happy with. Test the colour now and then by dabbing it onto your nail to compare the colour with your natural nail bed. Make sure to add some white to help make the colour more opaque. Let the gel sit for a while after mixing. Gel gets all thick and gloopy after you muck around with it and It needs to rest before you use it.


Here is the finished nail with the extended nail bed. The colour is really a perfect match! I used some white and cream coloured chalk powder to dust over my nail free edge to create a white tip that looks almost natural. I also dusted some of this whitish powder onto the moon of my nail. I'm pretty pleased with this little experiment.

I decorated my nails by sketching some pine needles on them using STAEDTLER Ergo soft triangular colour pencils and some glass beads. I also added some red nail polish dots. I put a good layer of gel over top of the artwork. I think I'll have to experiment a little more with this idea too.


I have added a companion video to my youtube page to help you see exactly how I did the colour mix and the nail art. Please check it out.

Creating a Natural Gel Colour Mix for Nail Bed Extensions

Saturday, November 19, 2011

Creating Gifts From Cherished Memories.

This set is designed to remind us of people and places we love and where we have come from. I've featured my Grandparents in this piece. The way they lived with each other will always be an inspiration and I miss them more than I can say.

We learn to love the same way we learn to craft....

by watching.


Materials needed to complete this project:

*I've used STAEDTLER Fimo soft because of its quick conditioning time and easy stamp-ability. This design works well with all Fimo clays.*

Colours of Fimo clay used:

Fimo soft Black# - 9

Fimo soft White# - 0

Fimo Effects Metallic Ruby Red# -28

Fimo Liquid Deco Gel 50 ml # 8050-00BKU

Fimo Metallic powder Gold 8709BK

Medium dark coloured chain about sixty cm.

Many different rubber stamps, one that says “love”.

Findings to match chain, head pins, eye pins, lobster claws, ribbon clamps, jump rings, earring findings.

Black one and a half cm sheer ribbon, you will need 10cm.

Old newspaper with small scale local landscape photos

Sticker paper with some old family photos printed onto it in black and white

E6000 adhesive


Tools to create this look:

Oven

Parchment paper

Wrist diameter sized mug

Baking sheet

Clay roller or pasta machine (non food use)

Thick wire, wooden skewer or toothpick to make holes in beads

Clean protected work surface

Jewellery pliers


Creating the central heart pendant:

Condition and roll out half a block of black Fimo clay to 3mm thick. Cut out a heart shape using a cookie cutter or create your own heart shape that is about 5cm by 5cm. Load one of your rubber stamps with gold powder and tap off the excess powder. Stamp randomly around the hearts outside edge, turning the stamp periodically to keep the pattern random. Condition and roll out the metallic red Fimo clay to 3mm thick. Cut out a smaller heart to go on top of the black heart as shown. Load your love stamp with gold powder and tap off excess. Stamp the word onto the red heart keeping it centred as much as possible. Push eye pins into the black Fimo heart in the two top points and one into the bottom point. Bake the piece according to package instructions.


Creating the photo charm:

Make a disk of black Fimo clay that is 5mm thick and no wider than 2cm. Push a thick wire or thin dowel through this disk from the top edge to the bottom edge. Print out family photos onto some sticker paper making sure to size them to the beads you wish to create. Cut your picture sticker to size and stick onto the top of the disc. Coat the picture sticker and the edge of the disc with liquid Fimo. Make sure to cover the edge of the sticker with liquid Fimo. Bake piece according to package instructions.


Creating the postcard charms:

Condition and roll out some white Fimo clay. Cut out some 2cm by 2 1/2 cm rectangles. Find a small black and white news print picture of some local scenery from a news paper. Cut picture out leaving lots of extra space on the edges. Cover the picture with a layer of liquid Fimo and lay the off white Fimo rectangle onto the coated picture. Press lightly with your fingers to seat the clay into the image. Make a hole with some wire in one corner of the postcard leave the wire in the clay for baking or the liquid Fimo will fill the hole back in. Bake piece according to package instructions. While piece is still warm, peel off the newspaper to reveal the printed image. Remove wire and let piece cool. With a fine point permanent marker write a note onto the back of the postcard. My image is of the local falls, the printed newsprint image isn’t as crisp as the embedded image above, but I enjoy the contrast in the piece.


Creating the different beads:

I simply made tons of different sized and shaped balls and cylinders. I poked holes with a wire or thin skewer and then rolled the bead over a stamp loaded with gold powder. Make a few beads the same size and shape so the earring beads have a mate. I will also encourage you to use the black clay first and NOT clean your hands before using the red clay. The slightly dirty look adds to the piece. Make sure the smaller beads have smaller holes so the head pins don’t just slip through them later. Bake according to the package instructions and let cool.


Constructing the necklace:

*If necessary use E600 to glue the inserted eye pins into the baked clay to make sure they are secure.*

Attach a piece of chain to an eye pin on each side of the heart, making one side 4cm longer than the other. Size the piece to suit your needs. On the longer end of the chain add some beads on a head pin and on the shorter end add a lobster claw clasp.

Tie a bow around the chain close to one side of the heart using the sheer black ribbon.

On the bottom of the heart add an eye pin loaded with some beads.

On this bead add three different lengths of chain with different charms on each chain.

One chain will have a photo charm on the end with a bead to finish it.

The second chain will have a photo charm in the middle of the chain and a head pin loaded with beads to finish it.

The third chain will have the postcard charm on the end of it.


Making the bracelet bar:

Condition and roll out black Fimo clay to 3mm thick. Cut out a rectangle that is 10cm by 5cm. Use a stamp loaded with gold powder to emboss the edge of the rectangle as you did the heart pendant. Condition and roll out to 3mm thick the red metallic Fimo clay. Cut out a rectangle that is 8cm by 3cm and place it in the center of the black rectangle. Stamp the word love onto this rectangle as you did the heart pendant. Push an eye pin into both ends of each short edge of the black rectangle. These eyes will hold the ribbon later. Wrap a mug roughly the size of your wrist in parchment paper and lay the bracelet bar onto the mug to achieve a curve. Bake the piece on the mug as directed on the package instructions. Let it cool completely before removing it from the mug.


Constructing the bracelet:

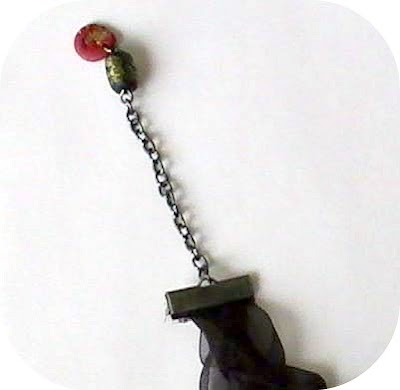
Thread some 20cm lengths of 2cm wide sheer black ribbon through each of the four eye pins inserted into the bar. Braid these ribbons loosely together and pin to hold braid in place while finishing piece. Clip a ribbon clasp onto the end of each bracelet end after trimming to desire length. (Seal the ribbon edges with fabric adhesive first if you worry about it fraying.) Add a 4cm length of chain to one end of the piece and finish it with beads on a head pin. The other end will be finished with a 2cm length of chain with a lobster claw.


Constructing the earrings:

Load some beads onto a head pin smallest bead to largest. Turn an eye in the end of the head pin and attach to an earring hook.


I pin things into boxes for gift giving. Adding a backing of foam-core into the box before adding tissue gives you something to pin to. It keeps the pieces from jumbling all together in the corner of the box and keeps them from tangling. I also added a little bag of extra beads to encourage the recipient to invent more pieces.

Hope this helps with your family gift making!


Friday, November 18, 2011

Proud Member of STAEDTLER's First North American Design Team.

I announced that I had some exciting news a while back and I've been holding this under my hat until the team was completed. But now I can gleefully share with you that STAEDTLER North America has invited me to play with them on their very first official design team.


There are links to the other STAEDTLER North America Design Team members in my sidebar. I'm proud to have been invited to mind meld with such gifted ladies.


I have been using STAEDTLER products for decades and have been lucky enough to have been published over the years, allowing me to share my adventures. Most of my latest work for them has been published in PolymerCafe magazine. It's been an honour
to have my work on the pages of this packed full of knowledge publication.

Here are some of my favourites.


Follow the links to grab your favorite issues of PolymerCafe.

I can't wait to share the ideas that are bouncing around in my head. There are so many different products and mediums to experiment with and so many ways to use each one.

It's mind boggling!

Tuesday, November 15, 2011

Sleepy Kind of Feeling

Some days are meant for relaxing.......


Wish they would leave room for me!

Saturday, November 12, 2011

Huevos del Estilo del Rancho... or a Healthy Breakfast of Ranch Style Eggs.

Sometimes there are perks to having a house full of giggling teenagers for supper.
I call dibs on Mexican leftovers for breakfast!!!!


I splashed about a cup of salsa into a frying pan and heated it to a simmer. Plunked in two eggs right on top there and covered it until the eggs were soft poached.


One of the kids was a vegan so I picked up some "not cheese". It's pretty delicious for not being real cheese so I threw it right on in there over top of the eggs and salsa and covered it again for a couple seconds to melt a bit.


I dumped the whole thing onto a multi grain tortilla chip covered plate and scooped some homemade guacamole on there too. I think it's a pretty healthy weight conscious breakfast. It sure was delicious.... now for a mid morning nap!
:D

Friday, November 11, 2011

Retro Deer Barrette

Things you'll need to make the Retro Deer Barrette:

STAEDTLER Karat Aquarell (watercolour) pencils
STAEDTLER Fimo liquid deco gel
STAEDTLER Fineliner 0.7 black
pencil and eraser (if drawing your own design)
Printer (if using mine)
medium soft bristle brush
water
Fabri-tac glue
black felt
green velvet ribbon about 2cm wide
red smallish beads
green sequins
thread and small eyed needle
pinking shears
brooch back or hair clip


Here is my set of 36 STAEDTLER Karat Aquarell pencils. I know eh? Pretty awesome! :D


I sketched out a deer and use a STAEDTLER Fineliner 0.7 in black to define the lines. Then I erased the pencil.


Here's the deer line drawing just in case you would like to use this instead of drawing your own.
Print the deer out to whatever size you would like it to be and trace over the lines using the Fineliner.


I picked out the Aquarell pencil colours I wanted to use and coloured along the inside of the lines leaving the middle of each shape free of colour.


Using a soft bristle brush I used plain water to spread the colour around inside each shape. I tried to keep the areas that would catch more light, lighter that the edges.


I filled the iris and the inside of the bow with black Aquarell pencil and blended it with a damp brush also. I used the black last so I wouldn't muddy the other colours if I accidentally hit it with my wet brush.


I outlined just inside the edge of the deer and bow with STAEDTLER Fimo liquid deco gel and then flooded the middle to create a pool of Fimo liquid just on top of the drawing. Find a spot close to the oven to do this and make sure the oven is preheated to 265 degrees before you start. The Fimo liquid is self leveling and will run past the edges pretty quickly if left uncured too long. Bake the piece for 20 minutes and allow it to cool.


Using a craft knife I cut the deer and bow off of the paper background. It's ok if some of the Fimo liquid ran over the lines. Just cut through the baked Fimo with the craft knife.


Cut out a piece of black felt with pinking shears that is roughly the shape of the deer. I made a paper template by tracing a quarter cm around the deer.


Use fabri-tac to glue the deer onto the felt piece and let it dry while you gather the ribbon, beads, thread and needle to finish the piece.


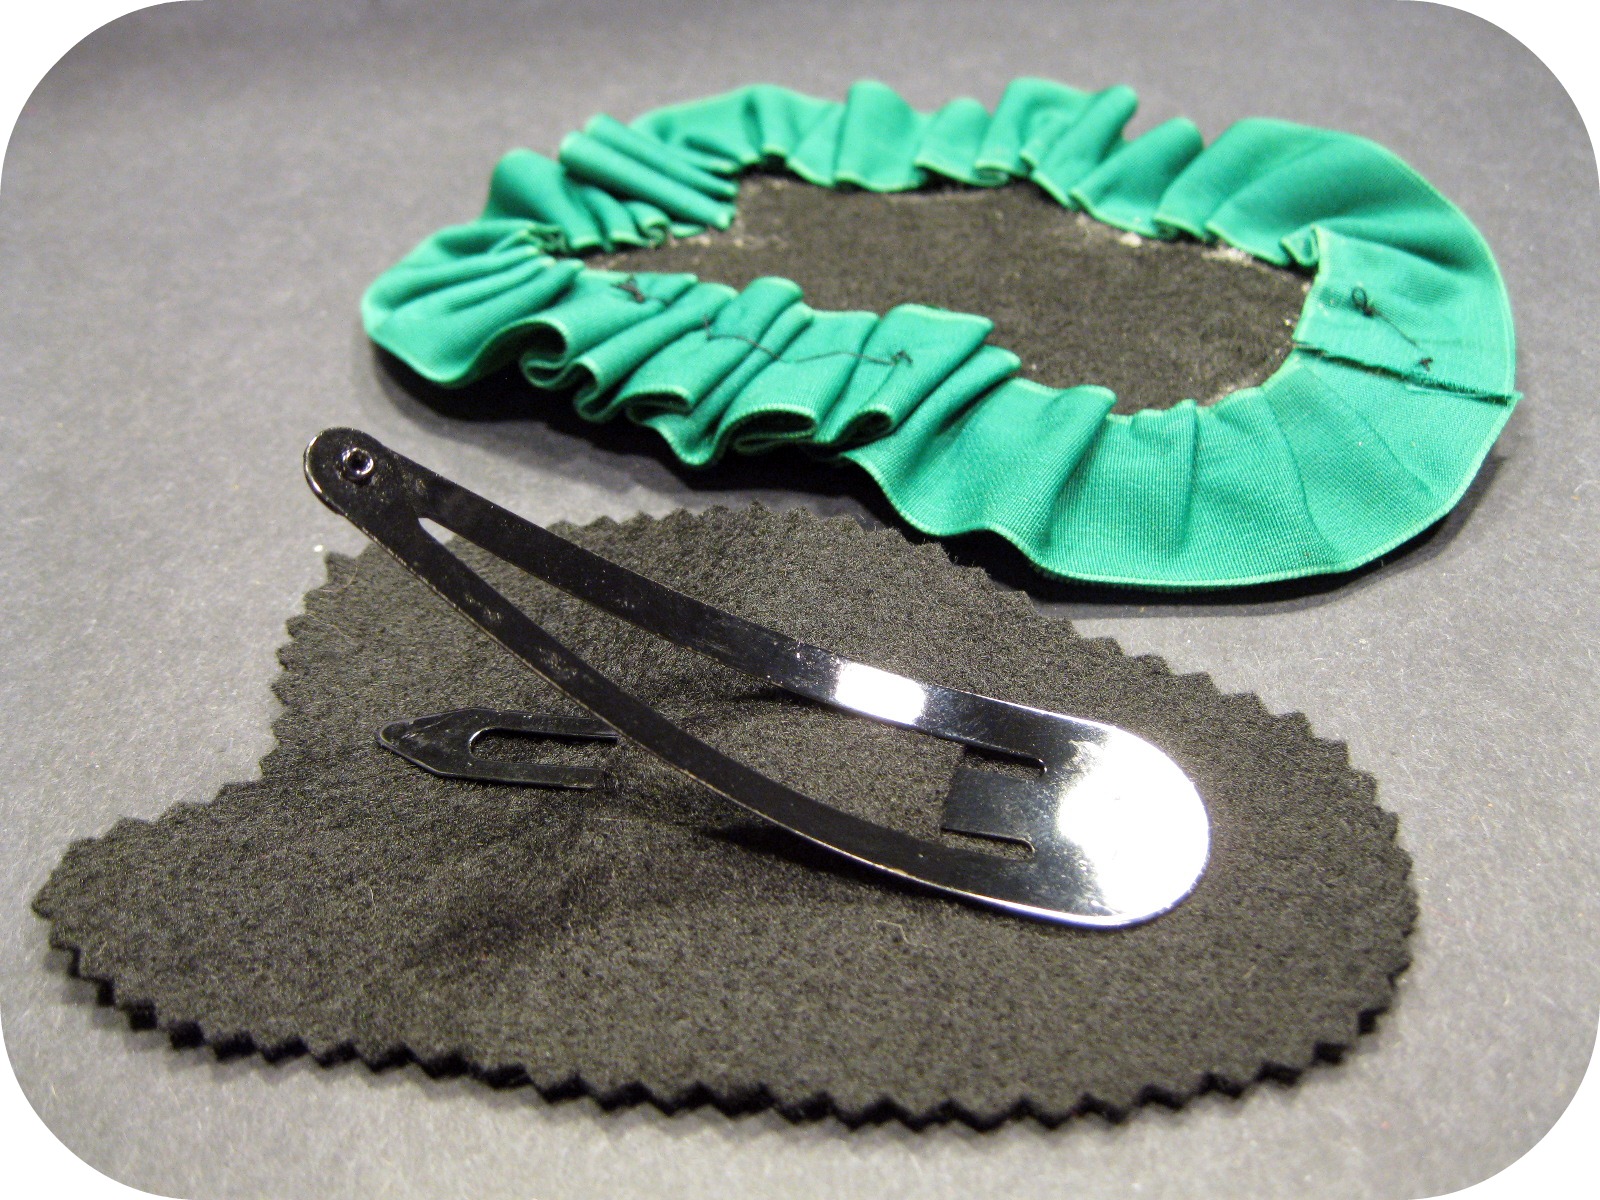
Use the fabri-tac to glue the ribbon around the back of the piece in a pleated halo. Try not to get any glue onto the front of the ribbon or felt.


Thread a needle with thread that matches the beads or the felt you have chosen. I sewed on a sequin and then a bead over the top. I made little clusters of these sequin bead pairs around the edge of the deer on the felt border. I tried not to make the clusters even.


Cut another piece of felt using the pinking shears roughly the same size and shape as the first. Cut two slits into the middle of the piece to accommodate the hair clip or brooch back that you are using. Poke the working bits of the brooch or hair clip up through the holes. Glue the piece of felt onto the back of the deer ribbon.


I love playing with these products!!!

The Karat Aquarell pencils have a huge amount of pigment. A teeny line of colour will fill a surprisingly large area once washed over with a soft brush and some water. And the Fimo liquid deco gel has been a favorite of mine for ages. Using it to coat this drawing has made this piece what my daughters used to call forever art. I can wear this out on the most blustery day and not have to worry about it being ruined by snow.

Let me see what you come up with by linking in the comments.
These will make great gift toppers this year.