Saturday, November 12, 2011

Huevos del Estilo del Rancho... or a Healthy Breakfast of Ranch Style Eggs.

Sometimes there are perks to having a house full of giggling teenagers for supper.
I call dibs on Mexican leftovers for breakfast!!!!


I splashed about a cup of salsa into a frying pan and heated it to a simmer. Plunked in two eggs right on top there and covered it until the eggs were soft poached.


One of the kids was a vegan so I picked up some "not cheese". It's pretty delicious for not being real cheese so I threw it right on in there over top of the eggs and salsa and covered it again for a couple seconds to melt a bit.


I dumped the whole thing onto a multi grain tortilla chip covered plate and scooped some homemade guacamole on there too. I think it's a pretty healthy weight conscious breakfast. It sure was delicious.... now for a mid morning nap!
:D

Friday, November 11, 2011

Retro Deer Barrette

Things you'll need to make the Retro Deer Barrette:

STAEDTLER Karat Aquarell (watercolour) pencils
STAEDTLER Fimo liquid deco gel
STAEDTLER Fineliner 0.7 black
pencil and eraser (if drawing your own design)
Printer (if using mine)
medium soft bristle brush
water
Fabri-tac glue
black felt
green velvet ribbon about 2cm wide
red smallish beads
green sequins
thread and small eyed needle
pinking shears
brooch back or hair clip


Here is my set of 36 STAEDTLER Karat Aquarell pencils. I know eh? Pretty awesome! :D


I sketched out a deer and use a STAEDTLER Fineliner 0.7 in black to define the lines. Then I erased the pencil.


Here's the deer line drawing just in case you would like to use this instead of drawing your own.
Print the deer out to whatever size you would like it to be and trace over the lines using the Fineliner.


I picked out the Aquarell pencil colours I wanted to use and coloured along the inside of the lines leaving the middle of each shape free of colour.


Using a soft bristle brush I used plain water to spread the colour around inside each shape. I tried to keep the areas that would catch more light, lighter that the edges.


I filled the iris and the inside of the bow with black Aquarell pencil and blended it with a damp brush also. I used the black last so I wouldn't muddy the other colours if I accidentally hit it with my wet brush.


I outlined just inside the edge of the deer and bow with STAEDTLER Fimo liquid deco gel and then flooded the middle to create a pool of Fimo liquid just on top of the drawing. Find a spot close to the oven to do this and make sure the oven is preheated to 265 degrees before you start. The Fimo liquid is self leveling and will run past the edges pretty quickly if left uncured too long. Bake the piece for 20 minutes and allow it to cool.


Using a craft knife I cut the deer and bow off of the paper background. It's ok if some of the Fimo liquid ran over the lines. Just cut through the baked Fimo with the craft knife.


Cut out a piece of black felt with pinking shears that is roughly the shape of the deer. I made a paper template by tracing a quarter cm around the deer.


Use fabri-tac to glue the deer onto the felt piece and let it dry while you gather the ribbon, beads, thread and needle to finish the piece.


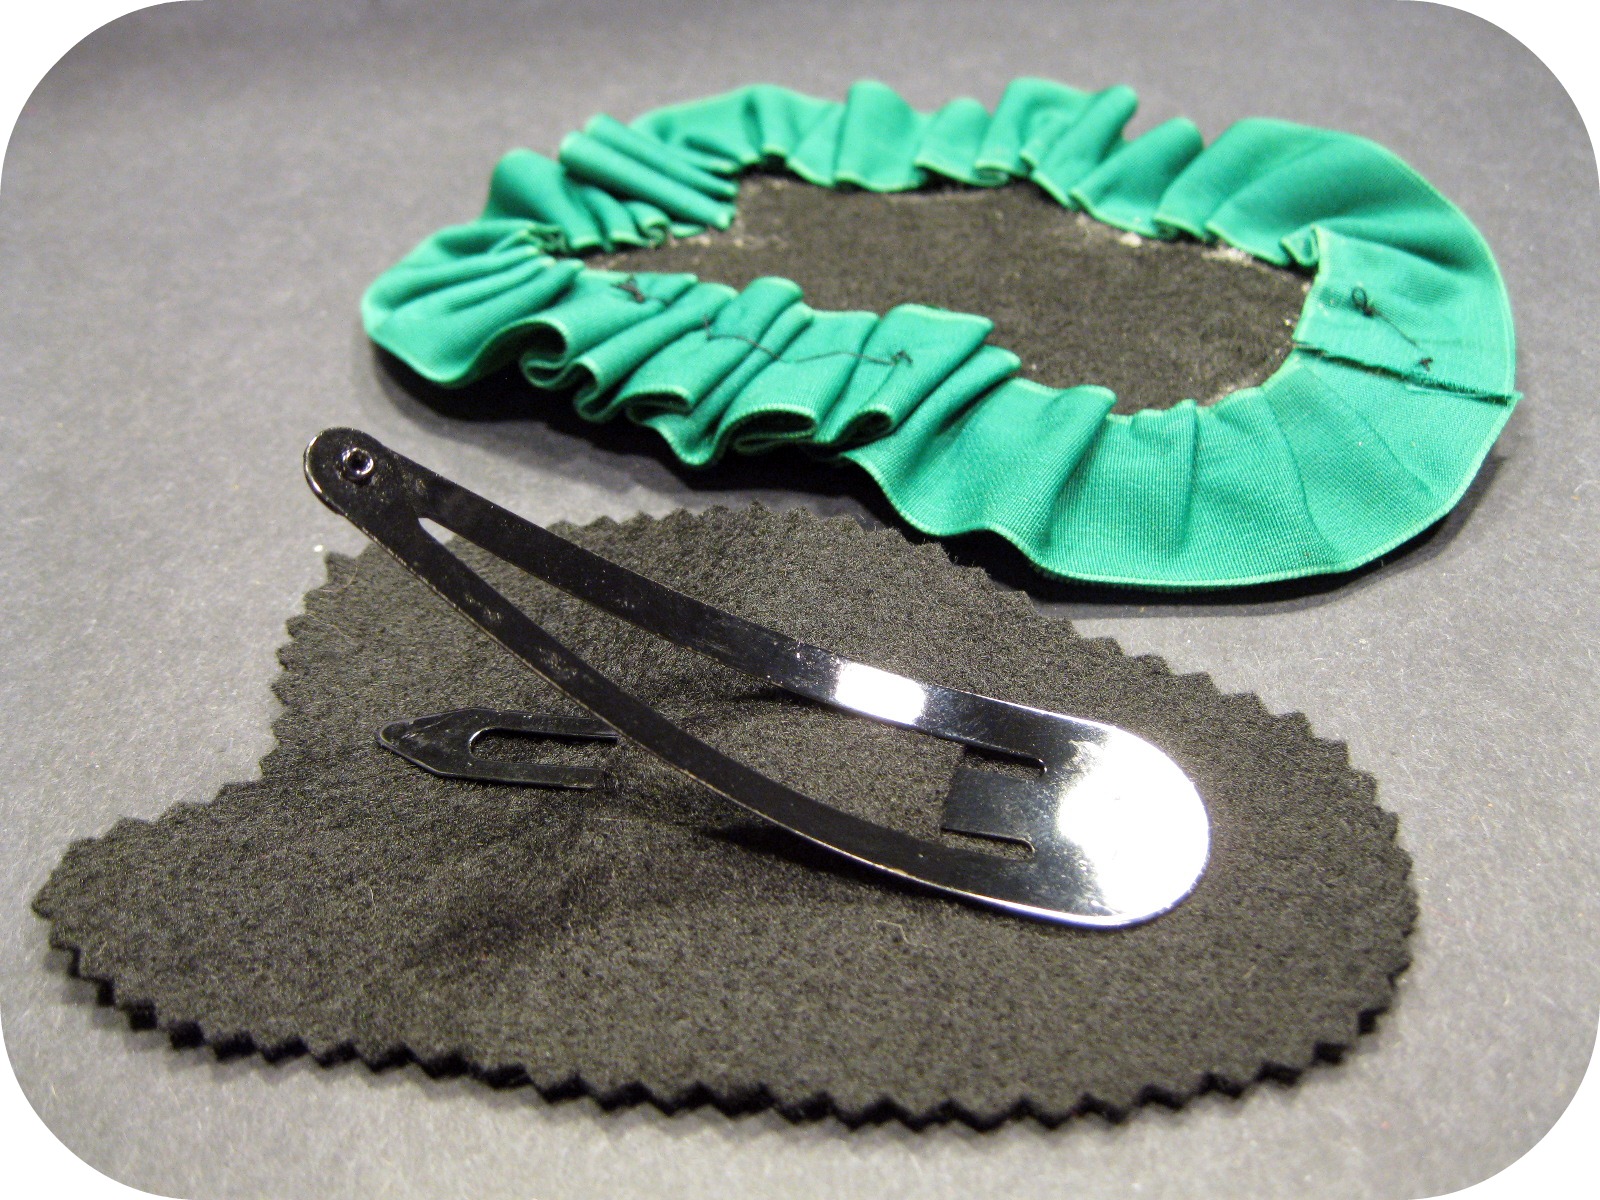
Use the fabri-tac to glue the ribbon around the back of the piece in a pleated halo. Try not to get any glue onto the front of the ribbon or felt.


Thread a needle with thread that matches the beads or the felt you have chosen. I sewed on a sequin and then a bead over the top. I made little clusters of these sequin bead pairs around the edge of the deer on the felt border. I tried not to make the clusters even.


Cut another piece of felt using the pinking shears roughly the same size and shape as the first. Cut two slits into the middle of the piece to accommodate the hair clip or brooch back that you are using. Poke the working bits of the brooch or hair clip up through the holes. Glue the piece of felt onto the back of the deer ribbon.


I love playing with these products!!!

The Karat Aquarell pencils have a huge amount of pigment. A teeny line of colour will fill a surprisingly large area once washed over with a soft brush and some water. And the Fimo liquid deco gel has been a favorite of mine for ages. Using it to coat this drawing has made this piece what my daughters used to call forever art. I can wear this out on the most blustery day and not have to worry about it being ruined by snow.

Let me see what you come up with by linking in the comments.
These will make great gift toppers this year.

Tuesday, November 8, 2011

Found Again Fays.

I found an old disc loaded with pictures from classes I taught forever ago.
These are some of my very first Fairies.
They're at least ten years old I'd almost forgotten about them.


A little regal Celtic Fairy on her throne of twigs and berries. Mom still has this one in her corner cabinet. She was my very first pose able Fairy doll. She has a wrapped wire armature and Fimo head, hands and feet. Her pinny is made from a fine hanky.


I made a mold of this one and I never did get a picture of her wings on.
I still have a few molds of her in the studio. We used the molds to make many faces and help students learn to paint details. We made brooches from them after.


A rare blue Fairy with wool roving hair and a hanky dress.

Do you have any of these done long ago project pictures hiding in your stash?
I love to peek in at them once and a while. It tweaks my memory and I rediscover old techniques and ideas to hopefully create new things.
Hope you liked meeting the girls.

Saturday, November 5, 2011

A Productive Day

It's really starting to feel like fall around here. Today we did a whole bunch of nesty things. Maggs rearranged her room, Mr. Jimmy raked the lawn and I made curry soup and chocolaty treats to serve with hot cocoa.


The soup had loads of squash and freezer junk, like tomatoes and stock made last month and frozen. We added some sausage and brussels sprouts and a few apples to sweeten the pot. We dunked out homemade seed bread into it and it was delicious.


Maggs and Mom and I decided we needed something sweet, so I went and picked up some red velvet cake mix. We turned it into kirsch flavored cake balls dipped in chocolate and speckled with walnuts. These won't last long around here.


I was asked by a family friend if I could rework a string of pearls that belonged to her mother. I'm turning a double strand into a single longer strand and a bracelet. It's therapeutic, stringing beads.


I decided to pull out some beads I got online and start playing with them too. I love these colours together. Red and turquoise are gorgeous and there is something retro about the colour pairing.


It was a great day!

Wednesday, November 2, 2011

How I Add Colour to My Acrylic Nail Powders With STAEDTLER Karat Soft Pastel Chalks

I've been looking for a more consistent way to add colour to my acrylic powder mixes. I have been using eyeshadow, but once you run out of a colour finding the same one again can be a challenge. I decided to try an old friend. STAEDTLER Karat soft pastel chalks are great to have in your art cupboard for a bunch of uses. We use them to add colour to all sorts of projects from paper mache to school drawing assignments. I decided I would get a colour I could rely on and go back to again and again if I mixed my own acrylic powder with these highly pigmented sticks.

Here's how I did it!


Things you'll need to mix your own acrylic powder colour:

STAEDTLER Karat soft pastel chalks in the colours of your choice
STAEDTLER Lumicolour permanent black 0.6 F marker
Nail file medium grit
Sheets of plain white paper
Nail brush
White acrylic powder
Clear acrylic powder
Sparkles in the colour of your choice
Small seal-able containers to hold mixed powder
clear nail tips
Monomer liquid
#6 round brush
Paper towels


Pick some colours that you would like to mix. I chose different gradients of blue for a future frosty project. Make sure your work surface is clean and protected. This can get messy. Lay out a sheet of clean white paper.


Put the tip of the nail file onto the center of a plain white piece of paper and file the tip of one of the chalk colours you have chosen until you have about a quarter teaspoon of colour on the paper.


Use the nail cleaning brush to clean off the nail file. Scrub it over top of the paper to collect the mess. Use the sheet of paper to pour the chalk powder into a small container. Repeat as many times as you want with as many colours as you'd like. Clean the file and brush between colours and use a new sheet of paper for each colour. I also find it helpful to start with the lightest colour first. It keeps colour contamination down.


Here's what I came up with. Four hues of blue. Approximately a quarter teaspoon each.


I decided to add sparkles and mylar flakes to the lightest two colours. I picked similar shades, but interesting combinations can be made by choosing contrasting sparkles. Mix in as much or as little as you'd like. I used about an eighth of a teaspoon each.


I added two scoops from my cuticle pusher, about a quarter teaspoon, of white acrylic powder to each pot.


I added ten scoops from my cuticle pusher, about one and a quarter teaspoons, of clear acrylic powder to each pot.


Seal up the jars and roll them around a bit to mix the ingredients together.


Huh.... They look pretty good so far. I'm going to have to test them to see if they are what I was looking for.


I wet my brush in monomer and picked up a ball of coloured powder. It instantly darkened. Most coloured powders you buy commercially darken when used, so I'm not worried. It's why I added white powder to my mix. Smooth the ball out onto a nail tip and shape it. Set it aside to cure and repeat with the other colours you've mixed.


I coated each test nail in a clear coat. They look great. The pigment in these little chalk sticks is pretty intense. A little goes a long way.


I grabbed my black Lumicolour to mark each tip with the corresponding colour number so I could keep track of my mixes in my colour diary. I really like that I can blend my own colours. The colour choices are endless now. Staedtler Karat pastels come in sets of up to 48 colours and they can each be blended together to achieve an uncountable array of rainbowy goodness.

Tuesday, November 1, 2011

Bacon Marmalade

Presidents choice brand has just come out with it's fall/winter Insiders program and I was all over checking out the new products. The first on my must try list was the bacon marmalade.
Sounds odd? But remember.... everything tastes better with bacon!
:D


We're still making our whole wheat bread every couple of days and adding sunflower seeds and ground up pumpkin seeds to the flax and bran and wheat germ. I made a couple loaves yesterday to go with the homemade beef stew made from the Sunday roast leftovers. I spread the still warm from the oven bread with the bacon marmalade and dipped it into the stew..........

It was DELICIOUS!!!!!

You can taste the bacon right away and then there is the roasty onions, they make it almost sweet. There is also citrus but it's kind of in the background flavor wise. It has a marmalade texture. I'm thinking of melting it down and using it as a glaze on meaty tarts or roasts.

My new favorite condiment can be used on pretty much everything meaty. Definitely burgers and hot-dogs, but I'm thinking sandwiches will taste better with some of this smeared inside. Crackers and cheese........ added to macaroni casserole......

Where are you guys going to use it?


Monday, October 31, 2011

Halloween Night and Tid Bits of the Season.

Pretty much what happened this All Hallows Eve.
It was a great year!


Every year there is a skull pumpkin of some sort. I got to do this years.


Giant toothy grin Jack o lantern by Mom.


Maggs completed the Pirate Jack o lantern.
Yar!


The yard all decked out and lit up.


Mom and Sebastian chillin'.


A few years ago Mom spilled some spider glitter onto the sidewalk and the kids LOVED it. So we do it every year now. Probably not very good for the environment, but it sure is pretty in the glow of Jack o lanterns.


This is the test makeup. Done a couple days before we really needed to dress up.


and here is the actual makeup on Mr. Jimmy and I at the event.
Really can't wait till next year.
We're planning something extra special.
:)
Hope you had a great celebration too.