Sunday, October 24, 2010

Halloween Decorating..... very late this year!

Mom and I did a big Halloween decoration push today.
We've been busy with other things and we are about two weeks behind. Usually the place has been gussied up for weeks by now.

We used hot glue to stick styrofoam skeleton parts to the front yard tree. Then we added a plastic cape and a sword........ he kind of looks like he might be a ring wraith.
:D

Here is the house so far. There will be more closer to the big night.


Mom got some plastic skull head decorations from the dollar store. We cut out the eye socket parts and put red plastic in there and wrapped it around the front porch light.


A little table vignette. The candelabra has a little purple sparkle spider in a black sparkle web. We have to carve the pumpkins yet and add the giant bowl of candy.


Porris Bentspine is all ready for the festivities. He is holding a Hubbard squash that will be soup soon. It will be replaced by a Jack o Lantern and he will probably be moved to the lawn.
I apologize once again for the blurry pictures, I'm still having problems with the camera.

Thursday, October 21, 2010

Chocolate Cockroaches.

These little cockroaches are a delicious addition to your Halloween treat table, and they are so easy to make. Plus they kind of went with my costume, birds love to crunch on bugs!

I cut up some no name grape licorice strings into 6 cm lengths and set them in threes on a parchment lined baking sheet. Let them curl so two point back and one points forward.


Then I melted some big bars of Presidents Choice chocolate in a double boiler and spooned a small dollop onto the middle of the licorice strings.
Now it looks like a body and legs.

Here Maggs is helping by dropping a mini Rolo head onto the front of each critter and a Presidents Choice praline onto the back of each one to make the body and closed up wings.
They were pretty delicious!


Wednesday, October 20, 2010

Candy Corn Nails!

I've seen several versions of candy corn nails online. I loved them all.
Here is my version. I used ibd's soak off colours Paradise collection with my white for the candy corn base. The black mini stiletto nails are left over from my weekend Old Crow costume.


10 days and 23 hours till the Haunting begins!!!!!!

BWAH HA HA HAHAHHAHAHAHHAHA HA
(maniacal laughter)

Monday, October 18, 2010

Mr. Jimmy Being an Octopus. (the making of)

This is Mr. Jimmy's Octopus prosthetic.
(Not Dr. Zoidberg!)

He sculpted it and made the prosthetic. The suction cups are cheerios. Seems to be the tool of choice if you listen to the octopodian you tube videos out there.


Mom lent a hand and painted Mr. Jimmy's head red for him. (I was too busy with Maggs at this point wrestling with my eyelashes to help much) We just used cheap dollar store red face paint in a tube.

He looks so relaxed here...... very different than when I spray painted him green last years
Brainiac costume build.

Here he's getting around his eyes with a little brush.

Sebastian knows who it is still.

We have to figure out this blurry camera thing. This is what he wore with his octopus face. I'll post clearer pictures as they come in. We had WAY too much fun this year!

A BIG thank you goes out to the Pete and CJ Show for their fabulous Birthoween event!

Every year you give us the excuse to play for weeks with latex and plasticine.
We are honored to have been part of the festivities over the years.

Love you two!
:D

*Edited to add another clear picture*

Thanks to the host of the party for this great clear picture of Mr. Jimmy.


Sunday, October 17, 2010

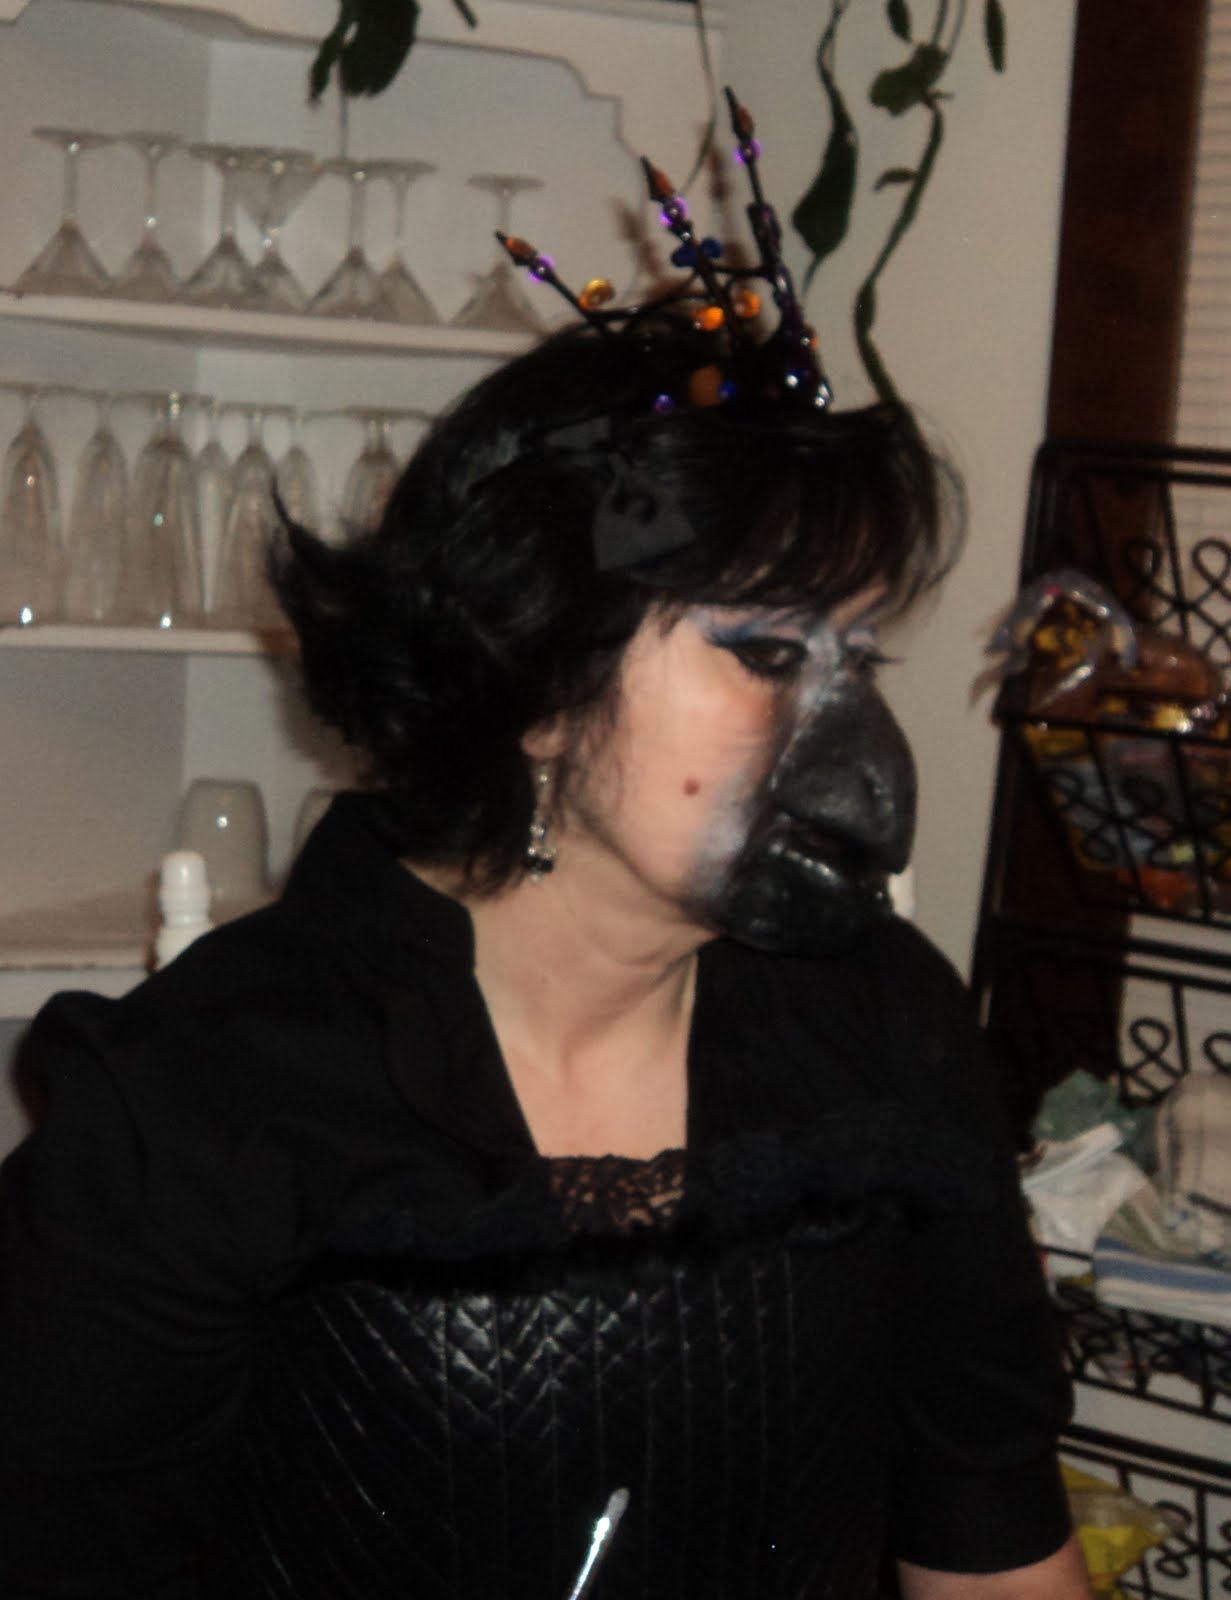
Putting on The Victorian Lady Raven (AKA: Old Crow!)

Posting the steps I took to turn myself into an Old Crow.


I'm adding some really Huge eyelashes here. They almost look like wings. Maggie had to help me put them on because they were so big I couldn't see anything until they were positioned correctly. I added some wispy lashes to the bottom lids too.


Loads of blue and purple and white and silver shadows. Paid attention to the highlighting and shadowy spots.

Here I am applying the lower beak with spirit gum. Always test this stuff on your skin before you wear it for a whole night....... even if you've worn it every Halloween for the last twenty years! I got a rash this year from it on the bridge of my nose.


Putting on the top beak. I applied the spirit gum to the inside of the prosthetic beak and repeatedly put the beak on and pulled it off until it stuck. You can tap the prosthetic gently with a fingertip over where it needs to stick also.


Mom said I needed to define the beak more with makeup. so I added some silver and black shadow to the edges of the beak where they meet my cheeks and chin.


Here I'm just trying to make everything even. Harder than you'd expect!


I thought I'de throw in a side view shot even though it's kind of blurry. Profile looks different than face on.


Here is a shot of Mr. Jimmy and I outside. We were loosing daylight and I rushed out for pictures before I got my beak shaded. But you can see the bustle and the corset doing their trick here. I also have black wings on that I purchased but didn't wear to the Fabulous Birthoween Bash! They were too big and I didn't want to be pushing folks around with them.

I'll post more pictures of the finished costumes as they become available.


*Edited to add incoming photos*

Thanks to a good friend with a good camera, we have a couple more clear pics of the finished Old Crow get up.

Here I am three quarters of the way through the evening. I was enjoying a tall cool glass of squid ink provided by Mr. Jimmy the Octopus.

A SUPER HUGE thanks to the guys for throwing such a fun packed evening. We're already planning for next year!
:D

Thursday, October 14, 2010

Beak Prosthetic Progress


I almost have the bottom jaw part of the beak done.

The pieces look like they will fit together pretty well. The top beak part is done. I have to add a few more coats of tinted latex to the bottom half before it's ready to un-mold.

I'll trim up some of the run over latex with a pair of scissors.


Here is a face on view. I think it turned out pretty well. I can hardly wait to put it on!


George the Cat kept leaning in for a kiss while I was coating my beak in latex. I was worried about getting it on his fur. But not too worried to take a picture!

I should have put latex on this guy!
Poor Mr. Jimmy!
His costume is going to be fabulous, we'll post pics of his build next week.
Happy Haunting!!!

Tuesday, October 12, 2010

Halloween Costume Update

The bustle mini skirt, or Gothic Lolita skirt for my Victorian Raven Lady costume.

I built the skirt on a duct tape copy of me that I discovered how to make through
Threadbanger

There are between ten and twelve layers of ruffle on the back of the skirt, and I'm not counting the three layers of feather boa I have tucked in there to represent tail feathers.
Most of the skirt is hand stitched in place and ALL of the fabric is recycled from pre loved clothing.
A BIG thanks to my Mom for scouring all the local thrift shops for black skirts.

Here is an update on the corset (also made out of mostly re-purposed clothing). I have the eyelets in place, however I don't think they're going to stay there long. The fabric was too flimsy and should have been reinforced down the edges where the eyelets went.

It's hard to see here but there is a scalloped edge on the bottom of the corset. The only new things I purchased for this piece were the bias tape trim (two packs) and the eyelets, everything else I already had or found at the thrift shop.

Singing Angel Ornament


Look who's on the cover of PolymerCAFE magazine for December!

I can finally start to share some sneak peeks with you all.
I've been busy the past few months with commissions and am excited to announce my good fortune in hitting the cover of this exquisite magazine. PolymerCAFE has been one of the best tools we have as polymer artists to hear about new exciting techniques and I'm more than thrilled to be asked to share.

:D

Saturday, October 9, 2010

Halloween Nail Break

It was a busy week of making things.
Most of the things were costume related and I'll post progress pictures tomorrow after turkey time. I can't wait, after having the whole gallbladder experience this year I am very grateful for turkey time. All that gravy and dressing and crisp golden turkey skin. So excited!!!

I made some more Hallowenie nails. These ones were inspired by Endora (playeed by Agnes Moorhead), Samantha Steven's Mother on Bewitched. Thanks to my Brother (Thanks Wade!) I've been enjoying the entire series. Endora wears this purple and green combination when relaxing and she has the most shocking orange hair. I'll have to be her for Halloween one year. She is fabulous!
I made the smiling Jack o lanterns and the bats that glow in the dark out of FIMO clay canes. I purchased the gels from Nail de Royale. I chose their ibd soak off gel kit called Paradise. The colours are perfect for Halloween, two fabulous greens, a red orange, an almost neonie purple, the darkest navy blue, and a golden yellow. My first time with soak off gels. I'll let you know how I make out.

Monday, October 4, 2010

More Halloweenie Costume Build Fun!

I've been busy!
I found a fabulous site with instructions and a pattern generator for corsets. Easy peasy to use, and FREE!
A HUGE thank you to Drea Leed, who I believe built this generator!
I am having problems contacting her via her email link. If any of you use the generator please contact Drea and let her know how it worked for you.
I'll keep trying to get her!

Custom Corset Generator

Here is the paper pattern I made using the generator in about ten minutes!


I used a cut open shopping bag as they suggested. It was the perfect size.


This is the inside of my corset. The right side is quilted black fabric cut from the bottom of a coat.
I have hand stitched the two layers together using a contrasting thread so I can see it to remove it later. I did this to avoid using pins to hold the piece together while I sew my channels for my "boning".

This is the plastic I decided on to make my boning. Two of my fabulous work mates spotted it. THANKS GIRLS!!!
It is the plastic shelf covers used to hold tags. I have some trimming to do, but I think these will work just fine.

This is the plastic all ready. I trimmed the edges off and cut the pieces in half. Then I rounded the ends so they wouldn't poke me through the fabric.

Here is the prosthetic piece so far. I have about twelve layers of latex on it now. Eight layers have been tinted with black latex craft paint and I have two layers of loo paper and one layer of paper toweling in there somewhere to give the piece support.