Well......
Things have certainly been interesting since I last checked in.....
We're about seven months into the Covid thing.
We are now a four generation household. Still tucking in together to keep our frontline workers safe.
I got to reopen the nail salon a while back with safety protocols in place. I'm only up to about two thirds capacity. I made sure to get the nurses and teachers back in first. I feel like we owe them at least a bit of a pamper.
Here are a few pics of the last half year or so.
Hope they give you a wee peek at what's been going on around here.
Loads of nail pics, mostly from fall design requests.


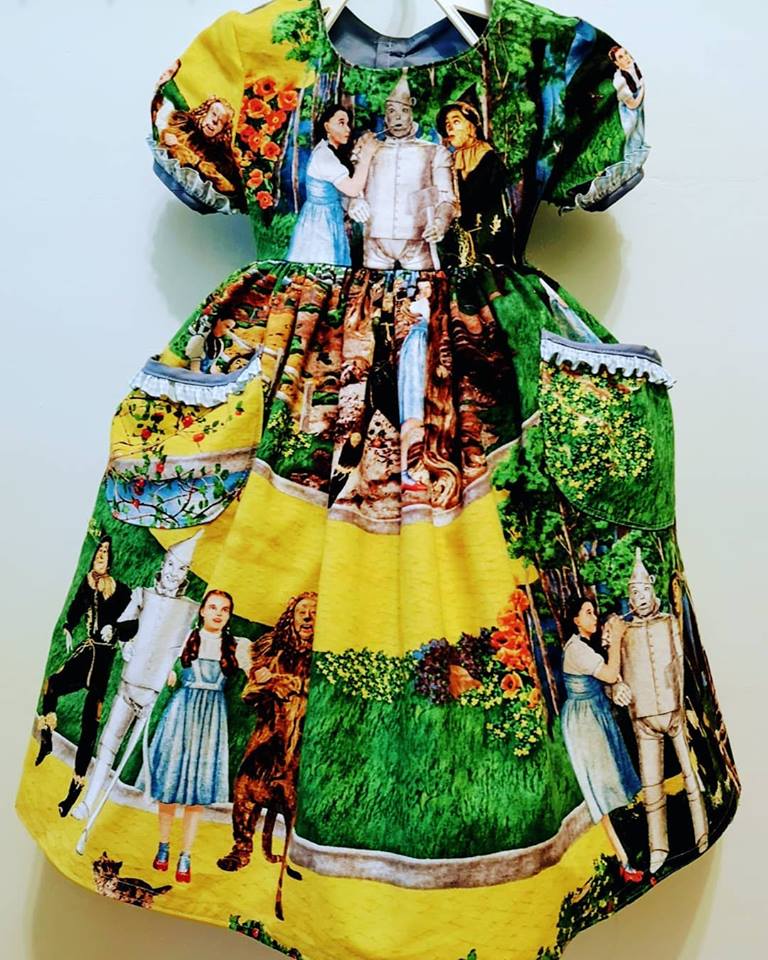
I managed a back to virtual school dress for beastie. It looked HUGE!!! But it fits. She'll probably get a couple years out of this one. She helped redesign the original pattern. Took off the collar, reshaped the neckline and added pockets of course! The fabric is Michael Miller and I'm in love with it.


More pretty fall designs.


We've been cooking up a storm and experimenting with different noodle recipes.

Loads of walks in our local woods. We even found some puff balls and had a fry up.


I scored some fun holographic foils


Beastie's veg garden was fantastic!!!
It's still going strong. We're planning four raised beds in the front lawn for next year.

Proof that I'm still ok.
Happy, healthy (knock on wood) and looking forward to a time that we can all be closer.