Tuesday, August 21, 2012

PolymerCafe October 2012 Front Cover

I'm all excited to be able to announce that I've got another project on the cover of PolymerCafe magazine.
I can't wait to get my hands on this issue!
Halloween issues are always my favorite and I keep them for decades. 
I used STAEDTLER fimo to make this guys hands feet and face.

I used the same eye technique that I posted about here. 

Here's our boy, posing sheepishly in the window of the Witches castle. Looks like he's finally gotten his hands on those ruby slippers. Such a clever boy!

This tutorial is focusing on how I add teeth to my dolls.  But it turned into a full blown doll construction tutorial. This style of doll is so fast and easy to make and he's a cuddler despite looking like an evil minion. 
Grab your copy quick!


Saturday, August 18, 2012

Jelly Shot Test Kitchen Love

Just wanted to share the love with you. I came across The Jelly Shot Test Kitchen a while ago and just decided to try a couple of their recipes out this weekend. They have the most beautiful photography of their teeny jelly shots and they're all so delicious looking that it was hard to pick two. 

Here's a picture of our spectacular results.

I chose the Paloma cocktail (the yellow one with the grapefruit segment) and the Bramble (the purple one with the berry and mint). We loved the two layer Bramble and will make it again, but the Paloma with the grapefruit was a little tart for our tastes. We all made the most ridiculous sour faces ever and had a great time laughing at one another.
Be sure to go and visit these folks! I can't wait to try more.

Thursday, August 16, 2012

Extra Fimo Beads... A Simple Bracelet Tutorial

I have a heap of extra beads made from STAEDTLER fimo and decided it was time I did a tutorial on stringing them into a wearable piece. I used the extra beads from this project .


Here is the pile of black and red beads I intend to use. I really liked these ones and I'm glad I made extra.


I'm going to string a bracelet but a necklace would be as easy. Just lengthen the string to make a necklace. I cut a piece of cotton string to 2ft long. I folded it in half and tied a lobster claw clasp onto the folded end.
I used white cotton for this project so you could see what I was doing. I will restring the piece later with black cotton. Try to match whatever colour the majority of your beads are to your cotton.


String on as many beads as you would like to fit around your wrist. I usually add one more than I need just for good measure.


Tie a jump ring onto the open end of the bracelet when your done adding beads, knotting it several times. Keep a little bit of slack in the cotton. If the jump ring is tied on too tightly the bracelet won't bend properly and may break. You can also add some fray check or white glue to the knot to secure it.


Re-string the cotton back down the last two beads and knot the cotton around the bracelet body a couple times.  Trim off the loose ends


Add four or five more ump rings to the tied on jump ring. These extra loops makes your bracelet fit more people. I also added a flat bead to the last jump ring as a little pendant.


Here are the finished working parts in action. It's clean and professionally finished, and it was simple and quick to make. I hope this helps any of you who haven't tried beading because of the finishing. Please do have a go.... it's relaxing and pays back.... Making your own accessories that exactly match your wardrobe is a dollar stretcher.


It's also a bit of a good thing to be able to whip up unexpected home made gifts.

Wednesday, August 15, 2012

Turquoise and Taupe Polka Dots

These aren't the most exciting nails I've ever done by a long shot...... but I'm really in a turquoise and taupe mood....... and yes, they're still stubby little nails until I get the retrovations under control.
I used my new Joe Fresh colours to do this design.

Monday, August 13, 2012

Scarecrow Building 101

I was asked to throw together a couple of scarecrows for our grown close to home display out in front of our grocery store and this is what I came up with. 


They're quite obviously deeply smitten with each other.

Here's a list of things you'll need to complete this project.

Two two by two boards about 8 ft long
about 3yards of burlap
4 x 4 sheet of two inch thick Styrofoam
straw, hey or excelsior to make hair and stuff gloves
about twenty sticks of high temp melt glue sticks and a hot glue gun
two pairs of garden gloves
2 x 2 ft long broom handles or dowels for shoulders
buttons, lace, trim and a collar or two
raffia or natural rope for a belt and tie
spray paint in leaf green to add colour to the burlap
duct tape
fake flowers
a basket
fabric paint
about six hours


 I started by cutting four 12 inch discs out of my 2 inch thick foam.


 I glued two discs together to make two 4 inch thick discs and I carved a rough face shape out of each disc.


 I covered each face in a layer of burlap gluing onto the back of the piece.


I glued each face onto the end of a 2 x 2 post. I angled mine slightly so I could make them look at each other.


I used packing tape for this but duct tape would probably be easier to handle. Tape the 2 ft long shoulder stick in place 3 or 4 inches below the head.


 Cut a 1 1/2 yard piece of burlap and fold it once long way and once short. Cut up one layer only of the folded side. this will make the bodice of the shirt.


Wrap the shirt over the shoulders keeping the opening at the front. Glue up the front seam overlapping the edges to create a button placket. Turn under the side seams and hot glue in place to secure.


I added another layer of burlap to the head and let it overlap onto the neck area. I glued all the seams to the back of the head to hide them and keep things neat.


I cut two sleeves that were 10 inches x three ft long and glued the long edges together to form a tube. After the glue set I turned the tube inside out.


I turned the end in and glued the arm to the shoulder.


I made another wider tube and spray-painted it green to make a hat. I tied one end to gather it and rolled a hem on the bottom. I added some excelsior hair and a collar and some buttons.


I painted the face using fabric paints. Big wide eyes made the start of a friendly scarecrow.


I added a mouth and cheeks and some irises. I also wadded up some burlap and made a nose and glued that on. I let the paint dry in the sun and applied the heat gun to it lightly to heat set the paint. Be careful not to scorch the burlap or heat the Styrofoam core too much.  Heated Styrofoam can release deadly gasses. Take care.


I was a little bit worried at this point.... These guys are HUGE beside my garage...... I hope they're not too big. The girl scarecrow was made the same way the boy was I just changed up the design slightly adding ruffles and a bonnet hat and some flowers. 


Here they are at their new home. They don't look too big here at all. We still have to add some gourds or fall veggies to the boys basket but other than that they look pretty happy here.


I'm gonna gush a bit..... isn't this a gorgeous looking store front? We're so lucky to have a shop this packed with options in our little community.... and I'm very lucky to be working for people who care.
Sorry for the gush, I couldn't help it. It's so beautiful and It's fall and I'm a happy camper......

Tuesday, August 7, 2012

Out With the Old.....Retrovation Puzzle.

 We've been busy with the retrovations around here.
Working on some major projects and trying to make our small space more live-able.

This is our front sitting room fireplace. It was made by the Majestic fire place company. I can't seem to get a hold of the company directly, they just keep sending me to a dealer nearest me. I want to ask them when the fireplace was made and wonder if anyone knows if it's rare or not. It seems to be brass plate. It has a water trough for holding water under the top canopy piece that is removable. It has four elements that heat up and two switches on the front I assume one is for the heating elements and one is for a fan?


Our front sitting room is a teeny weeny 12 X 12 foot square space. Here's a pic to let you know we did love the fireplace and we used it well over the years....


However........


This is what the space looks like now. We have three windows and two doorways (one double) in that room and absolutely nowhere to put a sofa without having to disjoint a kneecap to pass through the room. So what started out as a fairly innocent suggestion like, "Hey honey, what if we get rid of the fireplace?" has turned into a giant hole in the lath and plaster in the front room, many pieces of floor to patch because of hearth removal and a wall beam that defied gravity for an hour. We fixed that guy right away!

This making the house the way we want it is frightening business!
We are removing a retro and very cool fireplace to make room for retro decorating...... I think it's acceptable if we make sure the fireplace goes to a good home. 
What do you guys think? 
Is it ok to remove retro fixtures to update and personalize a space as long as the pieces are saved for future use?

Monday, August 6, 2012

Quick and Easy Five Grain Salad

We've been making a bunch of whole grain salads this summer. We usually do a couscous quinoa thingie that is delicious and filling but we spied this new product from President's Choice and decided to try it.


  It's their new five grain blend with spelt, barley, rice, kamut, Khorasan wheat and oats. Here is the package just in case you're looking for it in the shop. It's a smallish bag.


 You just boil the grains for ten minutes until it's cooked through and then drain it. I added a cup of acini di pepe pasta to the grains during the last three minutes of cooking to bulk things up a bit.


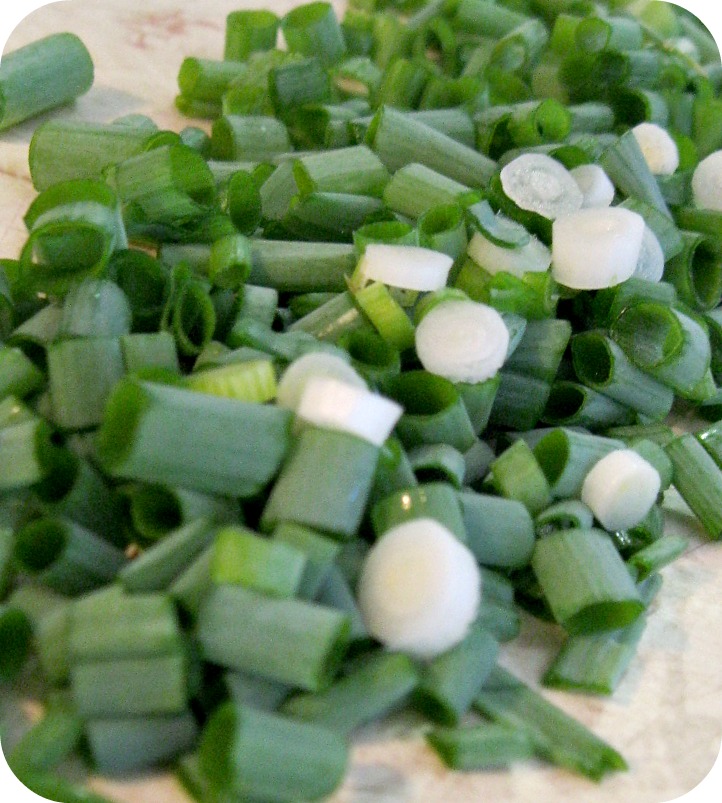
We added some of our chopped up garden veggies to the salad. We chopped up some green onion and parsley from the back yard. Then we chopped up some cucumber and tomato and grated some carrot and lemon zest. We dressed the salad with olive oil and lemon juice salt and pepper.


It really is a delicious salad..... and healthy to boot! 
Hope your family enjoys this as much as our does.

Monday, July 30, 2012

Decorating in the Colour of Retro

The retrovations continue....

 We recently purchased scads of fabric to make curtains for the living room / dining room windows. We're planning on using all three of these fabrics and the new geranium flowers somehow. I think the turquoise will be just an accent and the citron will be the main colour...... But things often change.


 These colours are already in the living room on the stool.


 and the colours are in the kitchen on the cafe curtains.....


and the cupboards....


 and they're in the dining room on the accent wall.
I am all excited to get started on the new curtains but cutting into that much fabric makes my knees a little weak. 

Any encouraging thoughts? 
Tips to bolster my nerves?
How do you gather the guts to cut into large amounts of fresh new fabric?

Sunday, July 29, 2012

Decorating with Grandma Maggie's Geraniums

We're still working on our house retro-vations. We went to Fabricland and picked up some yardage for dining room and living room curtains and we wanted to add a splash of red. The first thing I thought of as inspiration was my Grandma Maggie and her red geraniums. She used to always have a pot wintering over on the kitchen window sill and this cheerful pest repelling bloom will always remind me of her.
I wanted to make my own design so I started with STAEDTLER fimo effect in red glitter. I wanted to reproduce the design quickly and easily so I picked up some Easy Mold from Above Ground Art Supply in Toronto.

I started by making a cabochon shaped blob of clay and laying some teardrop shaped petals in groups of five onto it. I created some texture by adding indents to each petal with a sculpting tool.


I kept adding overlapping flowers until the cabochon was full. I dotted the center of each flower with a poking tool.


Here is the finished piece. I baked it in a 230 degree preheated oven for 20 minutes and allowed it to cool completely before the next step.


I made a smaller piece too. I wasn't sure exactly how big I wanted the piece and I've never used this mold making product before so I wanted to have some choices later.


I pulled out equally sized blobs of each of the two mold making components. It was much softer than I anticipated and almost odorless. 


I squished the two balls of product together just like I was mixing fimo colours together. The instructions said I had three minutes to mix but I didn't even need half that time to get a complete colour blend and start molding.


I made the mold medium into a smooth ball to avoid creases in the finished mold. My piece was thin so I opted to push the mold medium onto the piece instead of the piece into the mold medium. I started by placing the blob of easy mold on top of the piece and pressing firmly and evenly until the piece was covered.


After the top of the piece was covered I pressed the easy mold down into the sides of the piece. I made sure to push the medium into all the creases and dents of the baked fimo piece.


I let the curing mold sit with the piece in it for 30 minutes. The instructions said it only needed a 25 minute cure time but I wanted to be sure it was cured before I touched it. I un-molded the original and had a look inside. I have to admit, so far this has been REALLY easy! I think I'm going to be using this product for all kinds of future projects.


I started to make castings right away! I softened more STAEDTLER fimo effect in a couple of colours. I made little balls of clay and smooched it into the molds. The molds remain flexible so I could flex the molds to get the unbaked soft clay out easily without distorting the design. The instructions on the easy mold tell me that I can bake the clay right in the mold up to a temp of 400 degrees. That means I can create designs with even more detail and not worry at all about distorting the designs in the un-molding process. I can cure the duplicates right in the mold and flex the mold to release them after they've hardened.
Have you guys tried this cool product yet?