Monday, December 26, 2011

Holiday Hilarity

We do enjoy ourselves.
Hope you get to spend the Holidays with folks you enjoy too.

Merry Christmas.

Tuesday, December 20, 2011

Fimo Buttons for Knitting Projects

These button are so much fun to make. I really wanted to be able to use up some of the clay I have in the studio left over from old projects. I also really loved the idea of making my own buttons for my knitting projects. These look organic, almost like they're made from stone or bone. They were fun to make and only took a few minutes per button. They are addicting though and I spent almost two days playing with the process.

Here's how I did it.

To make these buttons you will need:

STAEDTLER Fimo in colours to match a knitting project (Keep it simple with no more than three or four colours)
Basic sculpting tools
A pasta roller for use with polymer clay or a clay rolling tool

STAEDTLER Fimo gloss varnish
Black pigment powder or eye shadow
A soft round paint brush


This is the project the left over clay came from. There is little wood canes and some turquoise and stone clay mixed. To see this project and the instructions for creating it. Grab a copy of PolymerCafe June 2011. Any clay colours that you like together will work. Try to match a knit project or use up some old clay and see what you come up with. Try to limit to no more than three or four colours.


I rolled out a light colour clay to a 1/4 cm thick sheet. Here I used Fimo effects 003 marble and some Fimo soft 39 peppermint that was previously mixed with marble to lighten it and a cane made from Fimo soft 7 caramel and 70 sahara. I cut up the clay into small shards and sprinkled them over the light coloured sheet.


I rolled this out in the pasta machine on the largest setting to blend it.


This is what it looks like after it had been folded and sent through the pasta machine five or six more times.


I tore off a piece of the almost blended clay and rolled it into a ball. I flattened the ball out with the palm of my hand against the table and shaped it by rolling it gently in my flattened palms until I liked the shape.


I picked a side to work on for the top of the button and started to make designs following the patterns in the clay colours. I used a stylus tool but a pencil or knitting needle tip would both be great tools here.


I kept adding lines and dots until I thought I was done. Then I used the end of a paint brush to push holes through the button. I pushed down through to the table, turned the button and remade the holes from the back to clean them up a bit.


I brushed some pigment powder in a shimmery black into the buttons surface with a soft brush. I dusted off the excess powder and baked the buttons for 15 minutes at 230 degrees F. Let the buttons cool off before the next step.


I used a medium grit sponge block nail file to sand the entire surface of the buttons. This sanding removed coloured powder from the high points of the buttons texture but left the colour in the grooves. It made them look old instantly. It was like finding treasure or being an archaeologist and discovering a specimen no one had ever seen before...... ok..... maybe I'm overstating. But it was very cool to see what happened when your design finally emerges. This would be a fun craft to do with little kids....... I might have to borrow some.


I finished the buttons off by adding a nice even coat of Fimo gloss varnish and letting it dry before coating the other side. I can't wait to add these to some of my knitting projects.

Sunday, December 18, 2011

Annual Holiday Crafting Session Begins..... or..... A Great Fimo Ornament Tutorial


Every year about this time, for the past eighteen years or so......

Oh..... has it been that many years? Oh my!

My girlfriend and I get together for a crafting day to finish up family gift making and get together for a good old chat. We had our Craft Session today and it was wonderful!

I finished up some presents that I will show a little later and Lynne made these gorgeous tree ornaments by embellishing clear glass balls with STAEDTLER Fimo.

Here are the things you will need to make six ornaments:

STAEDTLER Fimo soft in the following colours
white # -0
cherry red # - 26
emerald # - 56
lemon yellow # - 10

Fimo varnish in gloss
Fimo push molds Christmas design # -8725 06
6 clear glass ornaments
glitter in yellow, red and green
basic sculpting tools
Green mineral pigments or eye-shadow.
Soft paintbrush
Sanding block medium grit or spongy nail file


We started by cutting out some basic plaque shapes. You can make your own or print some templates from the Internets. We made them about 1/4 cm thick and made them fit on the balls we had. We rolled out worms of red green and white clay and twisted them together to make a candy cane worm to trim our plaques edges. We also used the Fimo Christmas push mould to create pine boughs and stars to decorate the ornaments.


After we had the plaques all cut and wrapped in candy cane worms, Lynne pressed a plaque onto each ornament's front. She pressed firmly but made sure not to leave dents and fingermarks.


Then it was time to decorate each ornament with the Fimo push mould bits. Lynne chose stars for one set and pine boughs for the other but there are many designs to choose from this one push mould set. She also added some little balls of red clay to the pine boughs and poked them in the middle with a pointy tool to set them into the clay pine boughs.


Lynne used a stylus tool to write messages onto the white plaque part of each ornament. Some have the year on them and others have names. If you aren't comfortable free handing this you could print some words out and trace them on first.


Next we rubbed some green mineral pigments onto the unbaked clay plaque part of each ornament. We made sure only to get the pigment powder onto the white part and really got it into the grooves of each letter.

We baked the ornaments with the plaques right on there. We put them on the wire wrack in the oven so they wouldn't roll around. We baked them for 15 minutes at 230 degrees and allowed them to cool off before the next step.


We used a sponge file to sand off the top layer of clay from each plaque and remove the pigment powder. It allows the pigment powder to stay in the groves made with the stylus tool. Dust the piece off well.


A nice even coat of Fimo gloss varnish on the plaque part of each ornament will make sure the pigment is permanent. Let it dry before moving on to the next step. Should only take as long as it takes you to drink a cup of coffee.


Next we added some Fimo gloss varnish to the berries and then sprinkled them with red sparkles. Let them dry and repeat with the green sparkles on the pine boughs and add some yellow sparkles to the stars on the other set of ornaments.


We let them dry in their plastic bulb holder.


But some juice glasses worked too.


We even hung a couple on the tree to see how they looked there. I think today was a pretty big success. I really love these ornaments! They were super fast and simple to create. Plus I got to spend a day with one of the sweetest people I know!

I love you my Lynnie!
Merry Christmas folks. I hope you get to spend time with some sweet people too.

Monday, December 12, 2011

Frosty Stiletto Nails

I've been pretty busy lately. So busy I haven't had time to do my nails. Today I made time. I wanted to have some frosty Stiletto nails to match our weather.

Here are the steps I took to make them.


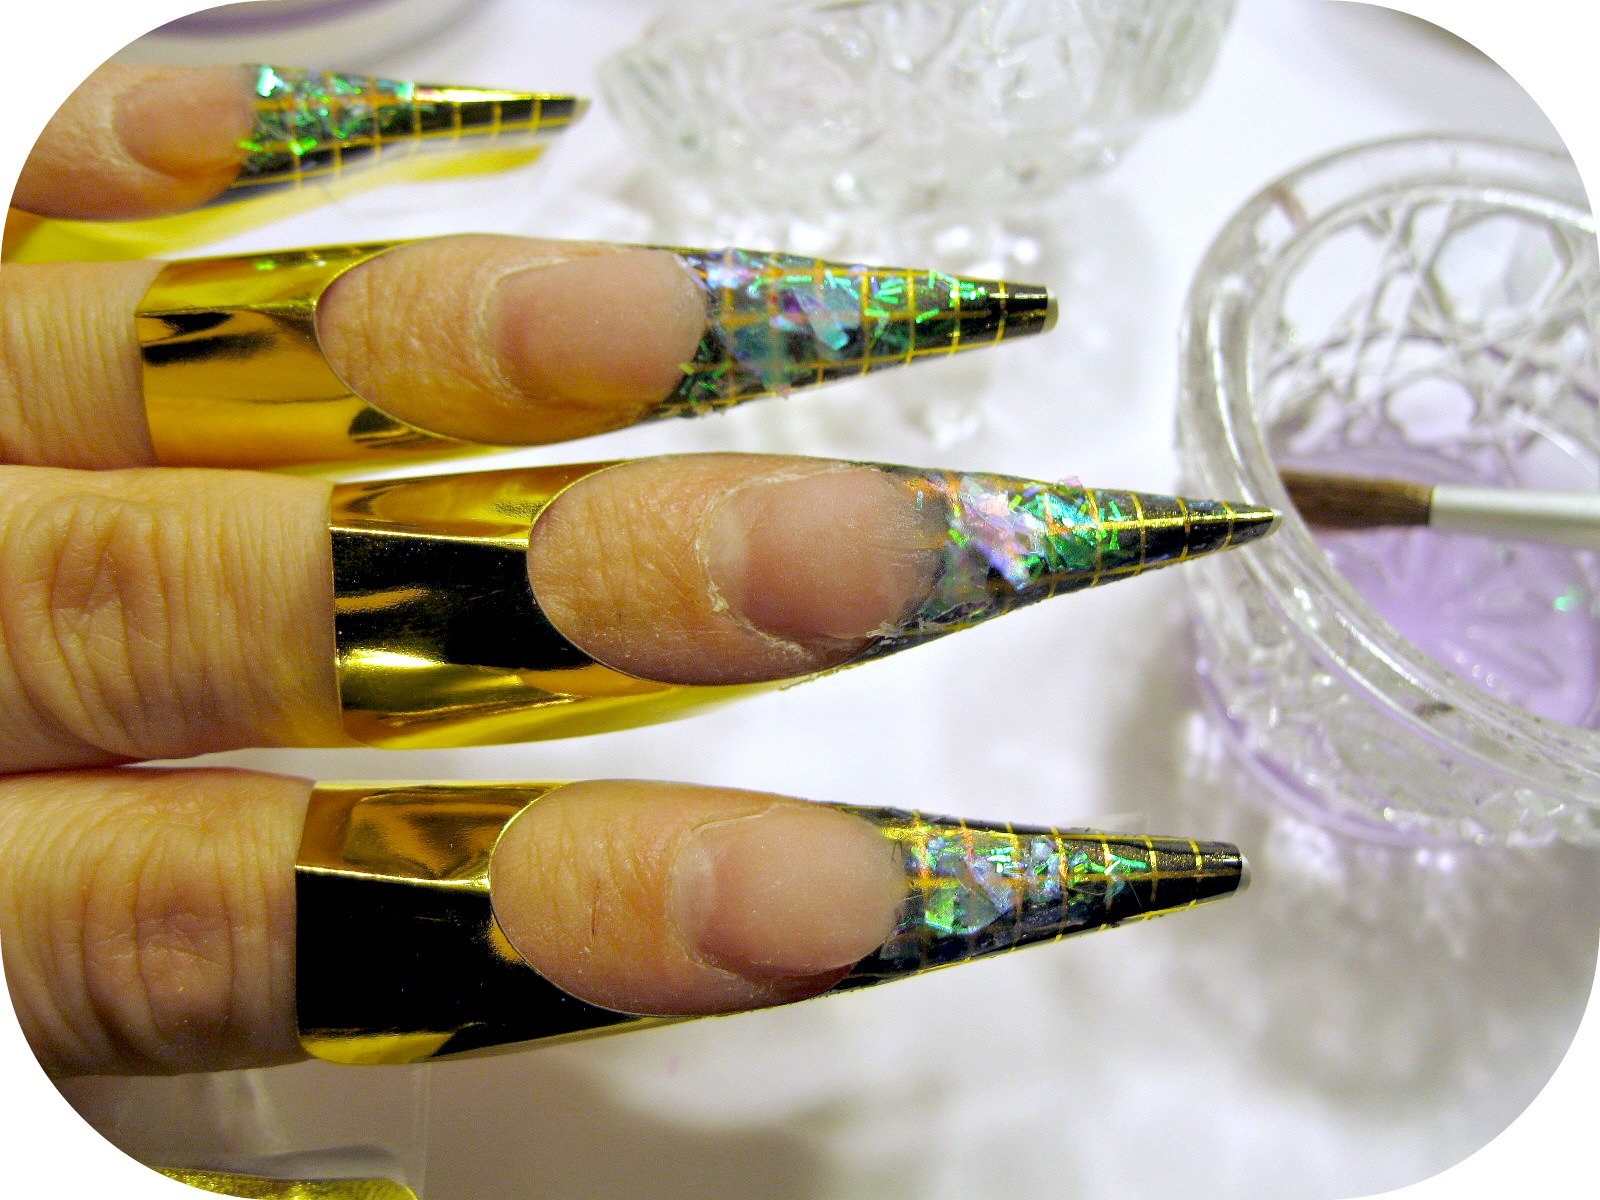
I prepared and disinfected and primed my natural nails as usual. Then I put on the foils and reverse applied some transparent pink to my nail bed. It sticks up a bit at the edge of my nail and makes a little ledge at the smile line to keep the coloured acrylic from invading that space later. I added a very thin layer of clear and speckled it with some iridescent Mylar and some confetti sparkles.


I made some little balls of clear acrylic and laid them on the sparkle layer. I tried to keep the balls separated and sticking up as much as I could. You'll see why in the next few steps.


After the clear balls cured I added some white acrylic over them and packed it right on in there to make sure it hugged each little cranny. I also paid attention to the smile line and keeping that crisp.


Next I removed the foils so I could file the tip area to shape and take the lumps off the tip area exposing the clear sections or balls I made earlier. You can see right through there to the sparkle layer I made at the beginning.


I needed to smooth everything out and create a curve to strengthen the nail so I coated the whole works with a thin layer of clear acrylic and let it cure.


I gave it one final file over to make sure everything was smooth and shaped prettily.


I used white acrylic paint and a Heinz Jordan mini script liner to make some swirls on my thumb nail and ring finger nail. I dotted some swirlies there too and the rest of the nails got a dotted smile line.


I coated the nails in a clear UV gel top coat and cured it in the UV lamp for 2 minutes.


I kind of like these ones, even if they do make me think of chilly cold snow and icicles.


I kept them a nice short to mid length stiletto so I can get work done.

I can't wait to show you everything I've been working on but I have to keep some presents secret! Prying eyes you know!

Sunday, December 11, 2011

Another Great Day

Maggs is taking cosmo this year in high school. It's her second year in that subject. I needed a hair cut.......... She's only ever cut the test doll hair... unless you count the time she gave the boy a Mohawk.


I told her to just do what she thought would look good.


It really is very even. She cut about three inches from the top layers and left the length as it was.


I don't think I've had a long layered cut this good since high school. I think I have a new hairdresser!!!!


Mom added some red to the tree..... It's getting Christmas-ier every day!

Off to make cookies with the Goblin girl.
I love my Maggie!

Thursday, December 8, 2011

Gift Making Using STAEDTLER Fimo Push Moulds.

I was lucky enough to get my hands on some STAEDTLER Fimo push moulds. I tried them out with some translucent Fimo effects first. I wanted to see how they came out in a solid colour before I tried to load them with separate colours to show detail. I loved how they came out and am seriously considering just leaving these as is and not adding any colour to them.


Here is the same snowman mould loaded with colours to show the detail. It was super easy to use. I pushed the clay into the mould using a stylus tool but you could probably use a toothpick or pencil tip. I can add eyes and a mouth later with a marker or some paint. This snowman mould is included in the STAEDTLER Fimo Christmas push mould #8725 06 along with fourteen other adorable seasonal shapes and characters.


I used the STAEDTLER Fimo jewellery push mould #8725 01 to make these teeny earring shapes. I filled them with STAEDTLER Fimo effects translucent and baked the pieces at 260 for 15 minutes. I used some jewellery adhesive to stick on some earring posts and I let them dry for a couple of hours.


I stuck the earrings into a block of unbaked Fimo so that I could paint them without them rolling about on me. I painted the earrings with nail polish! One coat and done. I like the way the nail polish fills the deeper parts of the shapes and makes the taller parts seem lighter.


I added a clear coat and studded some of the earrings with a rhinestone.


I'm going to be seriously busy form now until Christmas making things.


I totally plan on using cool tools like these these push moulds to make things more professionally finished.

Monday, December 5, 2011

Christmas Decorating Progress

I've been very busy working away on design projects. Mom's been very busy with decorating. It's her year to deck the halls, and they're looking pretty decked.
It's turning into a beautiful old fashioned Christmas.


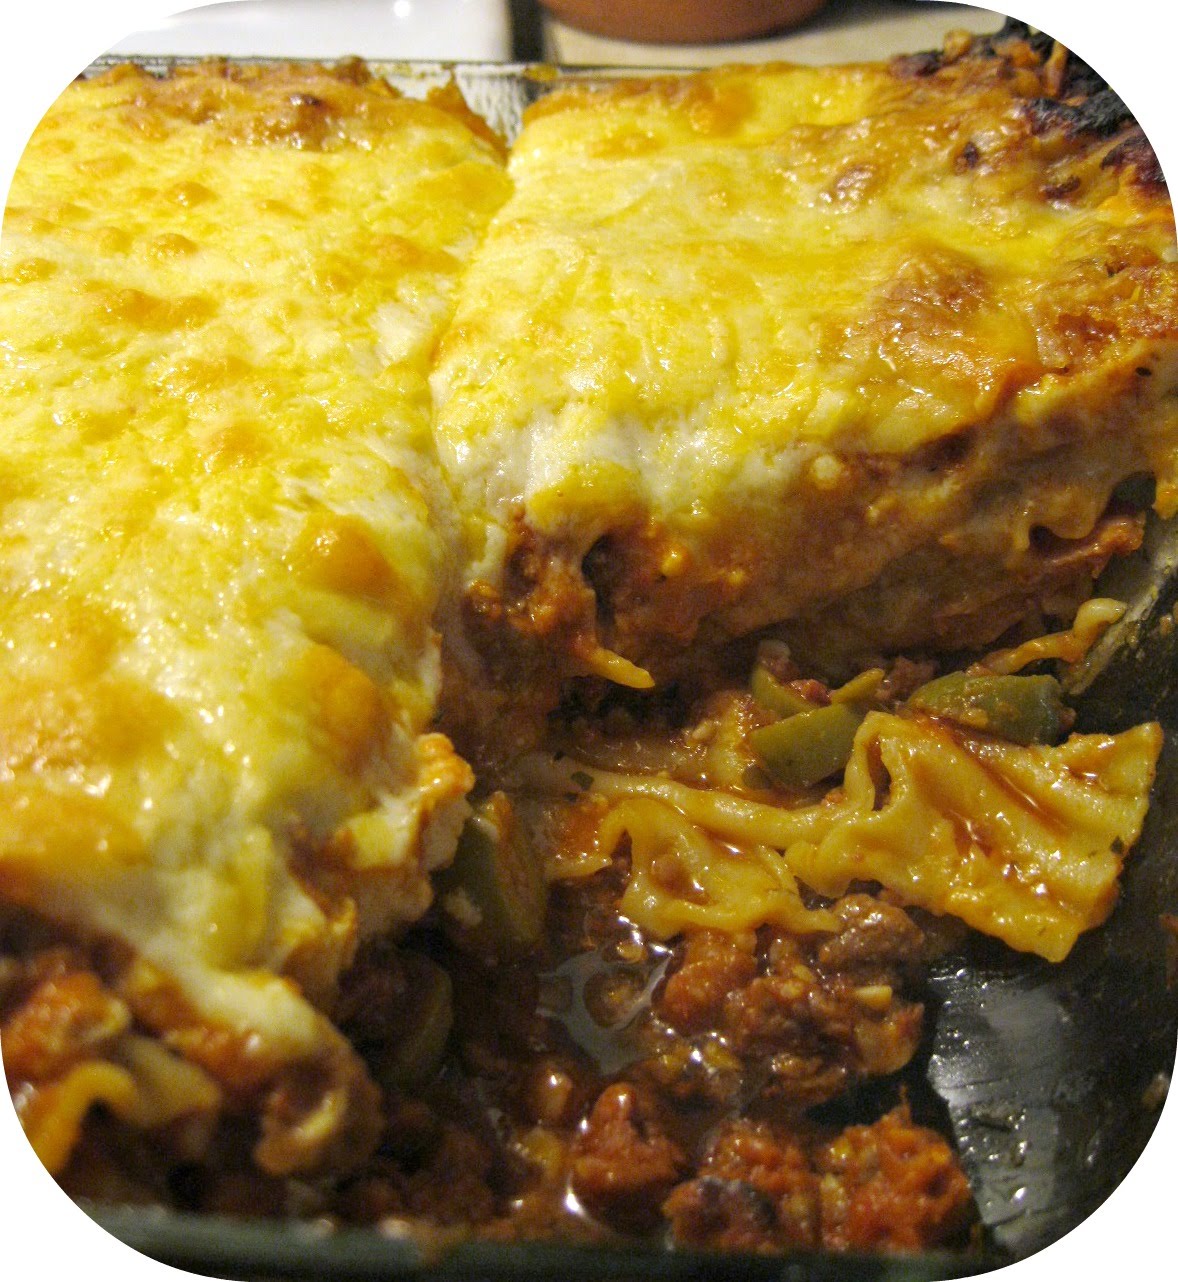
Mom also spent a load of time today building a tasty lasagna. She even put olives right in there! So delicious! Made it pretty difficult to keep my head down over the studio table.

I'd better get back to work.......
;)

Wednesday, November 30, 2011

A Textured Wildlife Portrait

Every now and then my Mom gets into the clay box. She has come out of it with some pretty awesome things. This wildlife portrait is one of those awesome things.


These little Jack-o-lanterns are another. They were featured in
PolymerCafe magazine October 2011.

Here are some things you'll need to make your own wildlife portrait:

STAEDTLER Fimo in various colours. (Mom used the clay I had in my use again box. It is the clay pieces left over from other projects. It might be a little dirty or not quite the mix I was originally looking for. Or maybe it was mushed up ends of old clay mixed up to make a new colour.)
Basic modelling tools
Framing mat
E 6000 adhesive
A rough sketch or photograph of the image you wish to recreate in clay


Mom started by rolling out her background colours. She used greys and blues to represent the sky. She used a pasta machine to get the clay to a 2mm thick sheet but the same thing can be done with a manual rolling tool. She used some white clay to represent the foreground. The white clay was a bit soiled and worked perfectly for blending a snowdrift. The pieces were laid out flat onto a piece of parchment paper.


On a separate sheet of paper, she started to create the basic shape of a polar bear. She used the darkest colour she would need to create the bears fur.


Mom overlaid some white onto this beige background silhouette letting a border of the beige show beyond the white. She added ear shapes and started to make some fur texture around the edges of the bear.


Next she began to add some detail. She brought in some black and charcoal to define the mouth, nose and eye areas. She also used her sculpting tools to create more fur texture.


There's a load more work done with this step. You can see more clay has been added in drifts and blended into the bears form. Care has been taken to create even more texture with the fur and you can start to see the underlying muscles.


Here she has added the bear to his background. He looks right at home there. Mom added some white clay to form drifts on the snowbank.


A bit more detail. It really is like painting a picture. Like any fine art medium, colour blending rules totally apply to all Fimo clay. Here she has added some drifts of blue to the sky and even more texture is showing on the bears fur
.


This shot show her blending the clay and working it into the picture. It's a great process and loads of fun to create the textures. It also feels pretty good to make gorgeous use of some of those clay odds and ends we all seem to accumulate.


Here you can see how much depth she got using the Fimo.


Another angle and different light makes it look like a completely different picture.


She used a photo mat as a guide to cut around the edge of the piece and keep the corners square. The piece was baked according to the packet instructions. 20 minutes at 230 degrees and allowed to cool on the baking sheet. She mounted the piece onto a sheet of glass and glued on a photo mat to frame the piece.

I really like this technique. I'm dying to try it on people portraits.