Sunday, June 30, 2013

Octopus Canvas Watercolour Shoes with STAEDTLER


The STAEDTLER design team members were all asked to decorate a pair of canvas runners using STAEDTLER art products. This is what happened to one of my pair.

Products I used to create these shoes:

STAEDTLER products:


Scotch Gard Fabric and upholstery protection spray
one pair of canvas shoes

Tools I used:
a selection of paintbrushes from small and soft to medium and coarse 
a spray bottle filled with water
a water bowl
paper towels


First I sketched a design onto the shoes. I tried to mirror the design onto the other shoe without copying it exactly. If I made a pencil mark I didn't like, I simply erased it with my plastic eraser. I stuffed the shoes with tissue paper to give myself a firmer surface to sketch on.


I wet a small soft paintbrush and dragged it across the colour of watercolour crayon I wanted to use. The more colour you pick up the darker the colour will be on the shoe. You might want to start with a light hand. These crayons are packed with pigment.


I sprayed the shoe with water to make it pretty wet and started to watercolour right onto the shoe. If you've never watercoloured before, you should know the paint travels quickly. Work on a wet surface to help the paint move. If the surface is dry you will create more of an acrylic paint effect with rigid lines.


After I filled in the background with a water colour, I wanted to create some detail shading so I dipped the tip of a sharpened  Karat aquarell pencil a little bit darker than my background colour into the water and drew right onto the sneaker. I used a short small stiffer bristle brush to push the pigment where I wanted it and blend it out a bit. This kept my lines crisp beside my octopus and allowed me to blend the pigment out on the background edge.


I began to add colour to the octopus by using a wet brush and picking up colour from the Karat crayons. I added pink, purple and orange shades. I left the highlights without paint so the white canvas would show.


I dipped a white Karat Aquarell pencil in water and used it to reinforce the white highlights of the canvas.


Then I used a deep blue to add depth and shadow around the octopus. I blended out the water edge and kept the edge toward the octopus crisp.


After the shoes dried, I sprayed them with two good coats of Scotch Gard and let them dry completely.  It's important to spray the shoes before you use the permanent marker. The spray will dissolve the marker and it will bleed.


After the sprayed shoes have dried thoroughly,  use the fine tip Lumocolor permanent marker in black to outline and give detail to the design. 

These were a load of fun to make. I think I might have to try another pair!
Hope you give it a try too. I'd love to see what you come up with!

Tuesday, June 25, 2013

Crafts4joy Made it With Me. The Mushroom Mood Lamp!

I know it's probably not a surprise to you folks that I write instructions for art and craft magazines and product manufacturers. I've been sharing designs and instructions for a few decades now and I'm always so so happy and amazed when I see the work of the folks who I may have helped inspire. I think it's time I share the work of some of these talented artisans with all of you. I'm hoping it will be a regular post here on Make It With Me. I'm certain you will be just as smitten as I am by these charming artists and crafts folk.

Here's our first ever "You Made It With Me" Post!


Here's the culprit. The Mushroom Mood Light I made for PolymerCafe April 2012. If you missed this edition and want to try this project out, you can still pick up a back copy by following the link.


These are some of the process shots I took for the magazine instructions.


This is what the AMAZING Annette Swensen came up with!!!
Seriously...... how spectacular is this!!!!!
Visit her facebook page Crafts4joy, to see even more of Annette's adorable characters.


If you'd like to share some of your Make It With Me inspired creations, just send me a note through the contact link in the header at the top of the page.
Thanks so much for sharing Annette. I can't wait to see what you come up with next!

Saturday, June 22, 2013

Carrot Cake Jam

 It's about time we started some summer canning. I purchased Taste of Home special editions canning magazine and let Maggs choose what recipe we would make first. She chose the Carrot Cake Jam and I'm so glad she did!


We followed the recipe almost perfectly, but Maggs couldn't resist adding some raisins. I think it improved the recipe. We should have used bigger jars.......


After we got the jam made we realized we were out of bread...... so we made that too!
Do you have a favorite canning recipe?

Monday, June 10, 2013

Sandy the Happy Crab, Beachy Trinket Box

I used STAEDTLER's Astrological Artist Mold to make this happy little crab box. The mold is heat and frost resistant and can be used with a heap of different mediums. I chose one of the new STAEDTLER fimo effect sorbet colours.

I think I may have to find some larger cardboard tubes and try this technique out on a bigger scale.


It sure was fun to make and it holds some of my beachy treasures. Teeny starfish and shells form the best vacation ever!

Here's what I used to make this project:

Tools I used to create this Crabby Box:
Empty toilet paper or paper towel roll
Craft blade
Clay roller
Parchment paper
Small soft round paintbrush
Water in a spray bottle


I rolled out the fimo clay to a 1/4cm thick and wrapped strips around the paper tube. A thicker strip is the base of the box and was about 4cm tall. The thinner band is about 2cm tall and will be the lid. Blend the seams where the clay meets by gently rubbing with your fingertips. Make sure all the edges are even and there are no fingerprints. Place the pieces on a parchment lined baking sheet still on the paper tube, and bake in a preheated 230 degree oven for fifteen minutes and allow it to cool before moving on to the next step.


Push the ends of the tube onto a sheet of 1/4 cm thick rolled out clay and use the craft knife to cut the circles out. Place a circle on each end and blend in the edge seams with your fingertips. Bake the piece again for another fifteen minutes and allow it to cool.


Mist some water into your STAEDTLER mold and press in an appropriate amount of clay to fill the mold. The water will act as a release agent. 


Remove the baked clay pieces from the paper tube and place the molded crab (or whatever shape you picked) onto the top of the box. Blend in the edges as before. Bake on parchment paper lined baking sheet in a preheated 230 degree oven for twenty minutes.


Roll out some clay to about 1/8th cm thick and cut a ribbon to go along the inside of the top of the base of the box. Blend in the bottom edge of the ribbon.


Mist some water into the smaller flexible mold and press in small amounts of clay to make the shapes.


Press the shapes onto the box and when you're happy with the positions, bake the piece again for another twenty minutes and allow it to cool.


Paint the fimo liquid onto the piece where you would like the sandy embossing powder to stick. Dust the powder over the wet fimo liquid and re-bake the pieces for ten minutes at 230 degrees.


Rub sme of the STAEDTLER chalks onto a piece of clean paper and dip your soft paintbrush into the glossy varnish. Pick up a small amount of the dusty chalk and paint colour onto the piece. Clean out your brush before you re-dip into the varnish so you don't put colour in the varnish pot. I think this is my new favorite way to add colour to my fimo projects.


I used the same technique to add some watery looking blue to the sand edges.


This was a blast to make and I really am hunting around for some shipping tubes to make a bigger version. I am smitten with the translucent cool watery look this clay has. 
Hope you give it a try too!


Thursday, May 30, 2013

Maggs is at it again! Look Away Those of Faint Heart

Seriously......
This is some great special effects makeup.
Really really good!
Not just saying that because my daughter did it!!!

Maggs' Grandma Judi got her a heap of special effects essentials for her birthday and we wanted to share what she's done with it. 

I've inserted (or attempted to insert) a jump break so those of you with weak stomachs don't need to see all the gory detail of Maggie's incredibly believable Zombie attack effects......

Here's a beautiful picture of our gorgeous and gentle Maggie for you folks to look at instead!
Hi ya Maggs!

Tuesday, May 28, 2013

STAEDTLER Sweet Summer Giveaway Winner!

And the winners are!!!!
(Why yes, I did make a drum roll sound with my lips.)


Isha Gupta 
won the STAEDTLER Sweet Summer Giveaway Prize featured above!


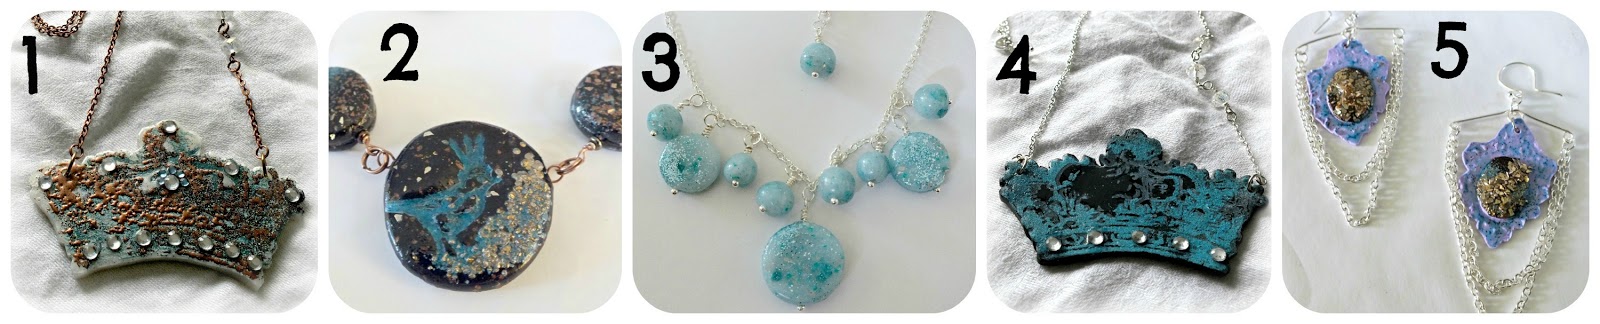
Yvonne Morentin won the Black Bird Necklace!


Chris Wooten won the Crown Necklaces!!


Girls please send me an email through my contact page so we can get your addresses and vitals for shipping.
YEAY!!!!
So happy to be able to share!


Sunday, May 26, 2013

Stampendous Glass Glitter and Mica Flakes in My Nails

Couldn't resist adding some of these glorious glitters from Stampendous to my gel nails.
Here are the results.


Full sun so you can see some of the sparkle.


In the shade.

If you don't do your own nails or aren't a licensed nail tech, you could certainly discuss taking these spectacular glitters into your local nail salon and have them added by your nail technician.


Sooooo sparklie!!

Stay tuned for the winners of our STAEDTLER Sweet Summer Giveaway with Stampendous early this week.


Saturday, May 25, 2013

Gertie's New Book for Better Sewing, The Peter Pan Blouse

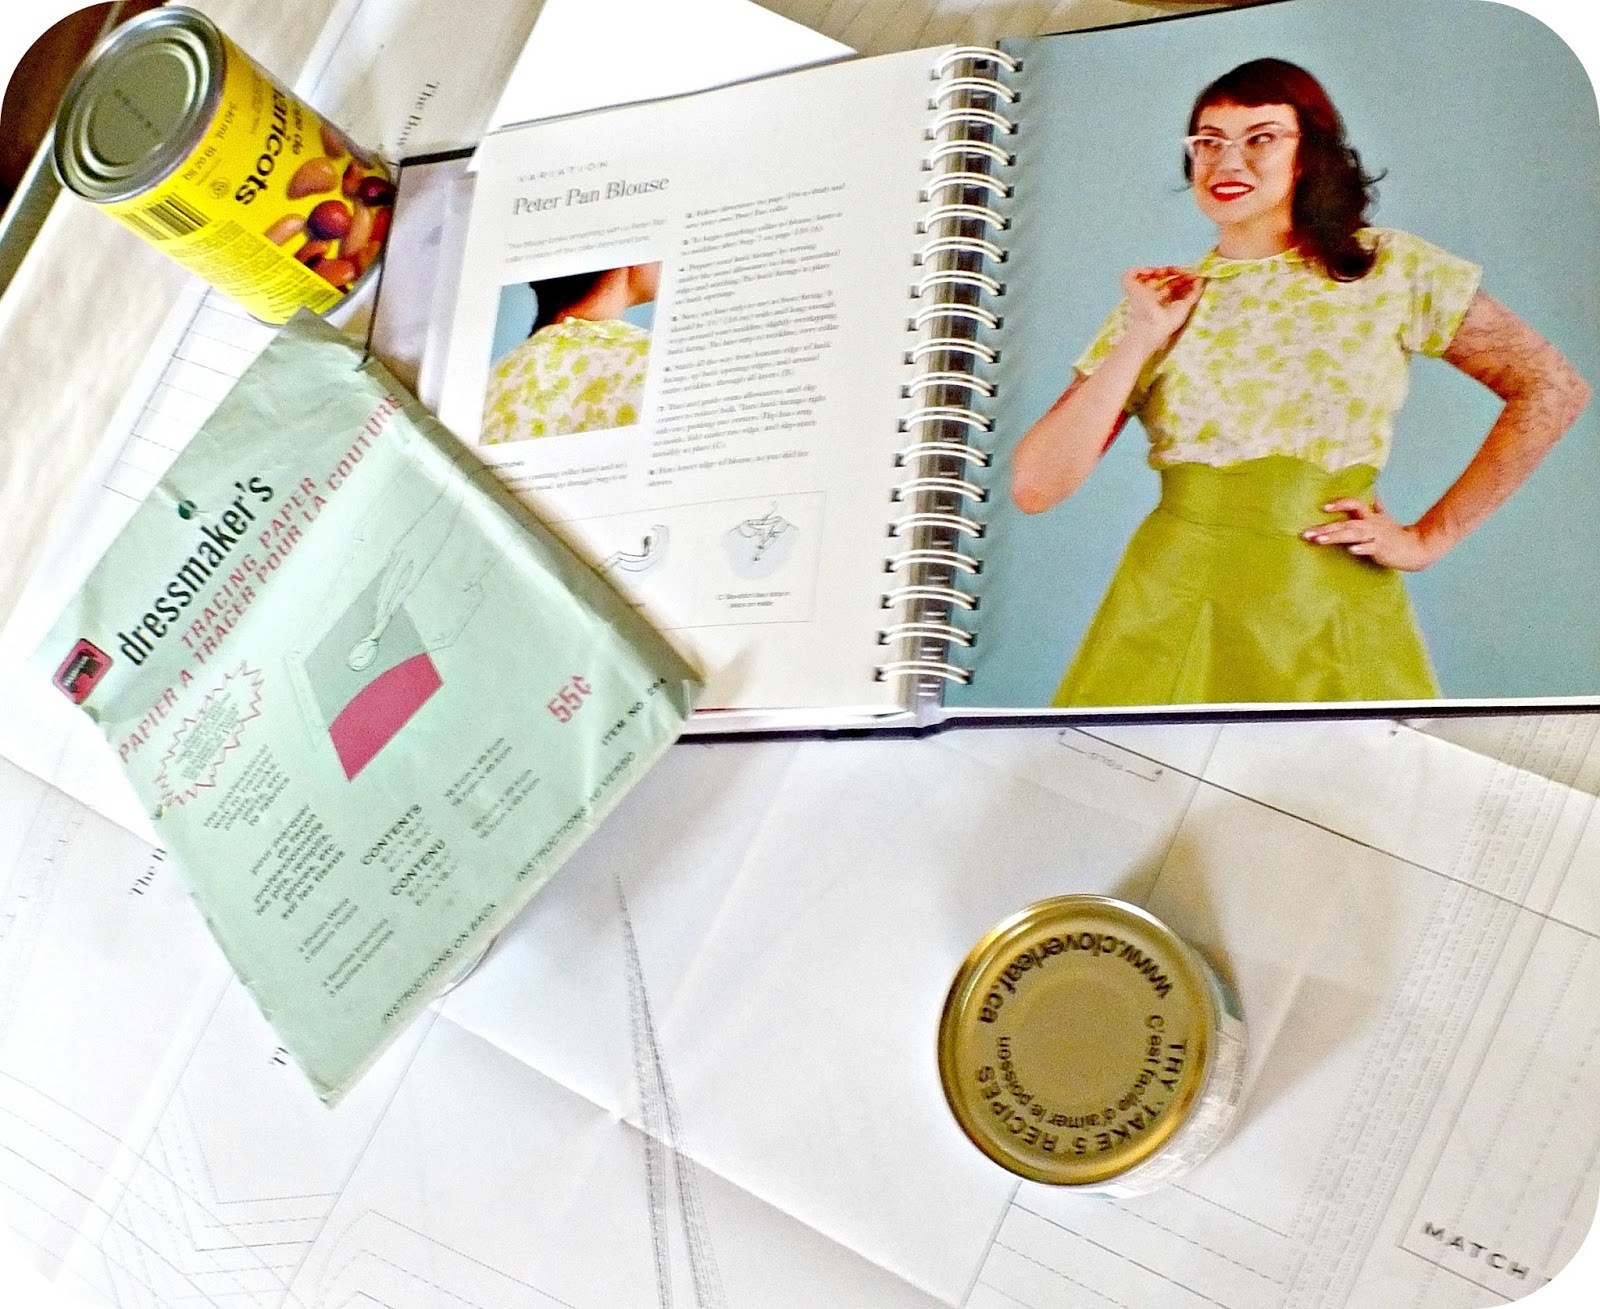
I bought myself a copy of Gertie's book.
Just got a few seconds to rub together to try it out.
I decided to make the Peter Pan collar blouse.


I unfolded the pattern and traced out the pieces I needed onto craft paper. I used cans of food to weigh down the paper and keep it in place while I traced. There are only three pattern pieces for this blouse. Gertie teaches how she drafts collars instead of just giving you the pattern piece. Brilliant! I spent the whole day playing with shapes and sizes until I had things looking the way I wanted them.


I decided to make two collars in contrasting fabrics. I like the look. I've seen friends post pics of blouses they've found with this collar. (I'm still blaming you Elizabeth Lee!) It feels feminine and frilly.


Here's the front of the blouse..... I really do like the collar. 


Here is the back of the collar.... you can see I need to work on my pattern drafting a bit. The back of the collar pieces overlap, but I don't really mind. I'll know for next time to keep that overlap measurement in mind. I love the little green buttons that I found in the button stash.


Here's the whole blouse on a hanger.....
Doesn't do it justice just hanging there empty like that.
All those roses will take a bit of getting used to.
Feels a bit Daisy the Clown to me right now.
Maybe with a jumper and cardy to break them up I'll like them more.

Just wanted to say thanks to the lovely Gertie. Love this book and can't wait to try out all of the many vintage and retro looks you've recreated in this fabulous and instructional book.


Friday, May 24, 2013

Overwhelmed.

I'm completely overwhelmed by the many talented designers who participated in this weeks STAEDTLER Sweet Summer Blog Hop and giveaway with Stampendous. We got to merge the wonderful products that these two companies offer and I had a blast playing.

Here's a list of links to the many fabulous blogs and their authors. I plan on keeping an eye on each and every one of them and am sure you'll want to visit too. (If I've missed any of the blog hop participants please let me know and I'll add you)


I'll be announcing the winner of STAEDTLER's Sweet Summer Giveaway early next week, along with three of my peeps who will have won some of the pieces I made for the hop.
I'm also flabbergasted by the wonderful comments I've received this week. I hope to see you all in the future.  I've got so many new projects planned for the next few months that I can hardly sleep and I'd love to share all of them with all of you.
You still have time to add a comment and join this site at the bottom of the page for a chance to win.
The comments will be open until midnight tonight.
Deadline extended until Sunday.
Here are some of the great "new to me" toys you'll see me playing with in the near future.
I'm a HUGE fan of the Stampendous product line. 

See you all next week!
Good luck!