Showing posts with label doll. Show all posts

Saturday, December 16, 2017

Well, That Didn't Go As Planned..... And a Bookmark Tutorial.

 I took last week off from the Salon so I could get some Christmas gifts made. We make almost everything. Usually we get a couple of purchased things but the  majority of our gift giving is home made. So.... I was all excited to start making..... And then..... The flu!!!

I'm almost caught up. We have heaps of things made (that I can't show you yet), but I have LOADS more to do. Mostly at the sewing machine. So I guess it will be between clients this week rushing to get it all finished. Really...... Every year I say I'll start earlier next year.....

Wanted to share this gift we made with Beastie.
It's pretty fast and easily made with things you probably already have in the house already.
Here goes...


Beastie Bookmarks:

You'll need:
Cardstock
colour printer
computer to manipulate photos
Photo of child reaching
Packing tape
sharp scissors small
white glue
Embroidery floss or string or ribbon
gauzy fabric
thread to match and hand sewing needle
bead


I took loads of pics like this. I had Momma Beast hold a string WAY up above Beastie's head and told her to reach for it. I wanted a shot that had her face up and arms up with a straight back. If you can get them to jump a bit for the string that works too.


I loaded the pic onto my PC and then onto a site called Picmonkey. Then I got rid of most of the background and made a frame around the pic. I flipped the framed pic so I could have a two sided bookmark. Then I printed it out in a couple of different sizes. Some folks like big books and some like little ones.


I cut out the images along the frame lines. This is helpful for keeping the images lined up. I glued the two mirror images together and let them dry flat. Once dry, I covered each side with some packing tape to make it more durable.


Then I cut those things out! I cut a tiny piece of fabric and gathered one edge with a running stitch and then I used the needle and thread to sew the tiny capes right onto the backs of the Beasties!


These are the beads that we made last year. We used FIMO Kids clay and had a HEAP of fun! I sewed a bead onto the hands of each bookmark using embroidery floss but you could use anything. Thread, ribbon, dental floss...... seriously! Whatever you have is great.
Beastie was thrilled with these!!! She wants to keep them all. I had to wait until nap time to put them up out of harms way..... I left her one so she could fly herself around the house like a tiny superhero.


We've been cookie baking too! These are the tiny tots creations. We added a bit more spice than the recipe suggested. We added cardamom and anise and ginger to the cinnamon and nutmeg. We also used a cookie mold shaped like an acorn leaving an indent in the middle of each cookie. Beastie wanted to fill 'em up with walnuts and chocolate. She is onto something here I think!!!


Wanted to share this recipe. It's from a very, very old out of print cookbook. Hope your Holiday plans are going smoothly and you're avoiding the flu!!!

Thursday, October 22, 2015

Pin Up Ghoul on STAEDTLER's Cover Page!

So happy to see this little ghoul again!
She's being featured on the STAEDTLER cover page with the product of the month!
You guessed it!


Happy October!


Sunday, August 16, 2015

STAEDTLER Lily Fairy Doll Make

I made up a Lily Fairy doll so I could send the instructions out to the contest winners, but decided to post them here so you could all see how easy (and fun) it is to create a doll using this fantastic STAEDTLER mold.

I changed the feet included in the mold because I wanted my doll to have curled, striped stockings on.

Monday, August 3, 2015

Sweet Summer Giveaway!


We've been very excited to announce this special summer giveaway!


of our blog followers will each receive a Lily Fairy kit containing....


12 half blocks of various STAEDTLER Fimo flesh tones.....


Contest rules and regulations:

GIVEAWAY CLOSED!!!!

To win, you must follow this blog
You must leave a comment on this post.
You must live on the planet earth.

Contest winners will be drawn on August 30th 2015.
Draw will be announced on Monday Aug 31st, 2015.
You've all got another day to follow and comment!!!

Good luck!!!

A HUGE thank you to STAEDTLER for sharing these kits!!

Now, join and comment!!!


Tuesday, September 16, 2014

Fimo Professional On My Work Table

GAH!!!! Just got my very first FIMO Professional 85g blocks of clay! Look at that delicious colour! I can't wait to open up these resealable packs of awesome and get creating! 


I spied one of my projects on the FIMO Liquid page of the new STAEDTLER pamphlet. I've been given the go ahead to share the project here with you. So read on and click to see the full instructions for how to create these metal look pieces using FIMO Liquid and FIMO effect clay.

Wednesday, May 21, 2014

Batty Bathilda in Watercolour Crayon

I've been sketching up a heap of designs these past few weeks. I use my STAEDTLER Triplus fineliner markers and my Karat Aquarelle watercolour crayons the most when I'm trying to figure ideas out.


I thought you should meet Bathilda. She'll be hanging around in other forms very soon.
I'm still trying to figure out expressions and costuming before I commit to a 3D version of her and make her real.


I really am loving the process.
I think I might just be a huge kid and LOVE to colour.
Note that MOST of the colour is in the lines.


Sunday, April 27, 2014

Progress, Slow and Steady

Thought I'd give a sneak peek at how I develop some of my designs. A big part of helping an idea become an actual piece is sketching it out. I grab my STAEDTLER pigment liner four pack and get on with it.


I start with a soft pencil and go over my lines with the pigment liners. If the sketch turns out to be something I want to continue on with I can erase the underlying pencil and elaborate on the ink lines.
George is keeping a very close eye on me.


My sketch books are filled with ideas roughed out like this one.


These sketches help me remember construction ideas and possible materials. Do you use sketches to rough out ideas before you create?

Wednesday, April 9, 2014

Ridiculously Teensy Cupcakes for Absolutley No Reason

This is really a tutorial on how I made my mini cupcake liners. There are a billion and eight cupcake tutorials out there and most of them are pretty spectacular. I think it might be helpful to show how I make the thin translucent STAEDTLER Fimo Effect cupcake liner, so here goes......

Sunday, March 16, 2014

And so..... It Begins!

Super excited to get started on some projects that have been in the planning stage for EVER!
There are more than 40 different designs in the works.

It's an ambitious few projects and I'm completely stoked about getting things up and running.
I've spent the weekend conditioning heaps of STAEDTLER Fimo Puppen. It's my go to clay for doll and puppet making and I'm so happy to have it in my hot little hands again. 

Here's the tutorial I posted for making these eyes. If you're feeling like playing along with us, you might want to craft up a few of your own.

I'll be sharing more about what's happening over the next few months.
I can tell you that I've finally given in to those of you who have been at me to sell my actual work, not just the instruction. And I can't wait to introduce you to our creations!

Wednesday, January 1, 2014

Invaded by Elves

 I made these festive little Elves for Mom almost 20 years ago. We bring them out every year to help get us in the spirit. They're our version of a shelf elf. I made them fully pose-able with an armature very like that of the Retro pose-able Santa I made recently for PolymerCafe and STAEDTLER.

I used STAEDTLER Fimo Puppen to make these guys.


Their eyes are painted on. I think that's the biggest change I've made in my doll making process. 

Hope you folks have all had a great start to 2014.
We're looking forward to some bold new choices for Make It With Me.
Can't wait to share all the new ideas and hear what you've all been up to.

Saturday, December 7, 2013

Booze Filled Chocolate Santa Heads

You totally read the title right!
Thought I'd share this one for any of you who are looking for something extra special to make for that person who has everything. I made some booze filled chocolate Santa heads using a mold  made from the Retro Santa created for this December's issue of PolymerCafe magazine. I couldn't resist making a copy of the Santa head before I painted and assembled the piece. I used a food grade mold putty so I can totally use it to cast chocolate. It's also bake-able..... wonder if there are some Santa head cookies in my future?


Monday, November 25, 2013

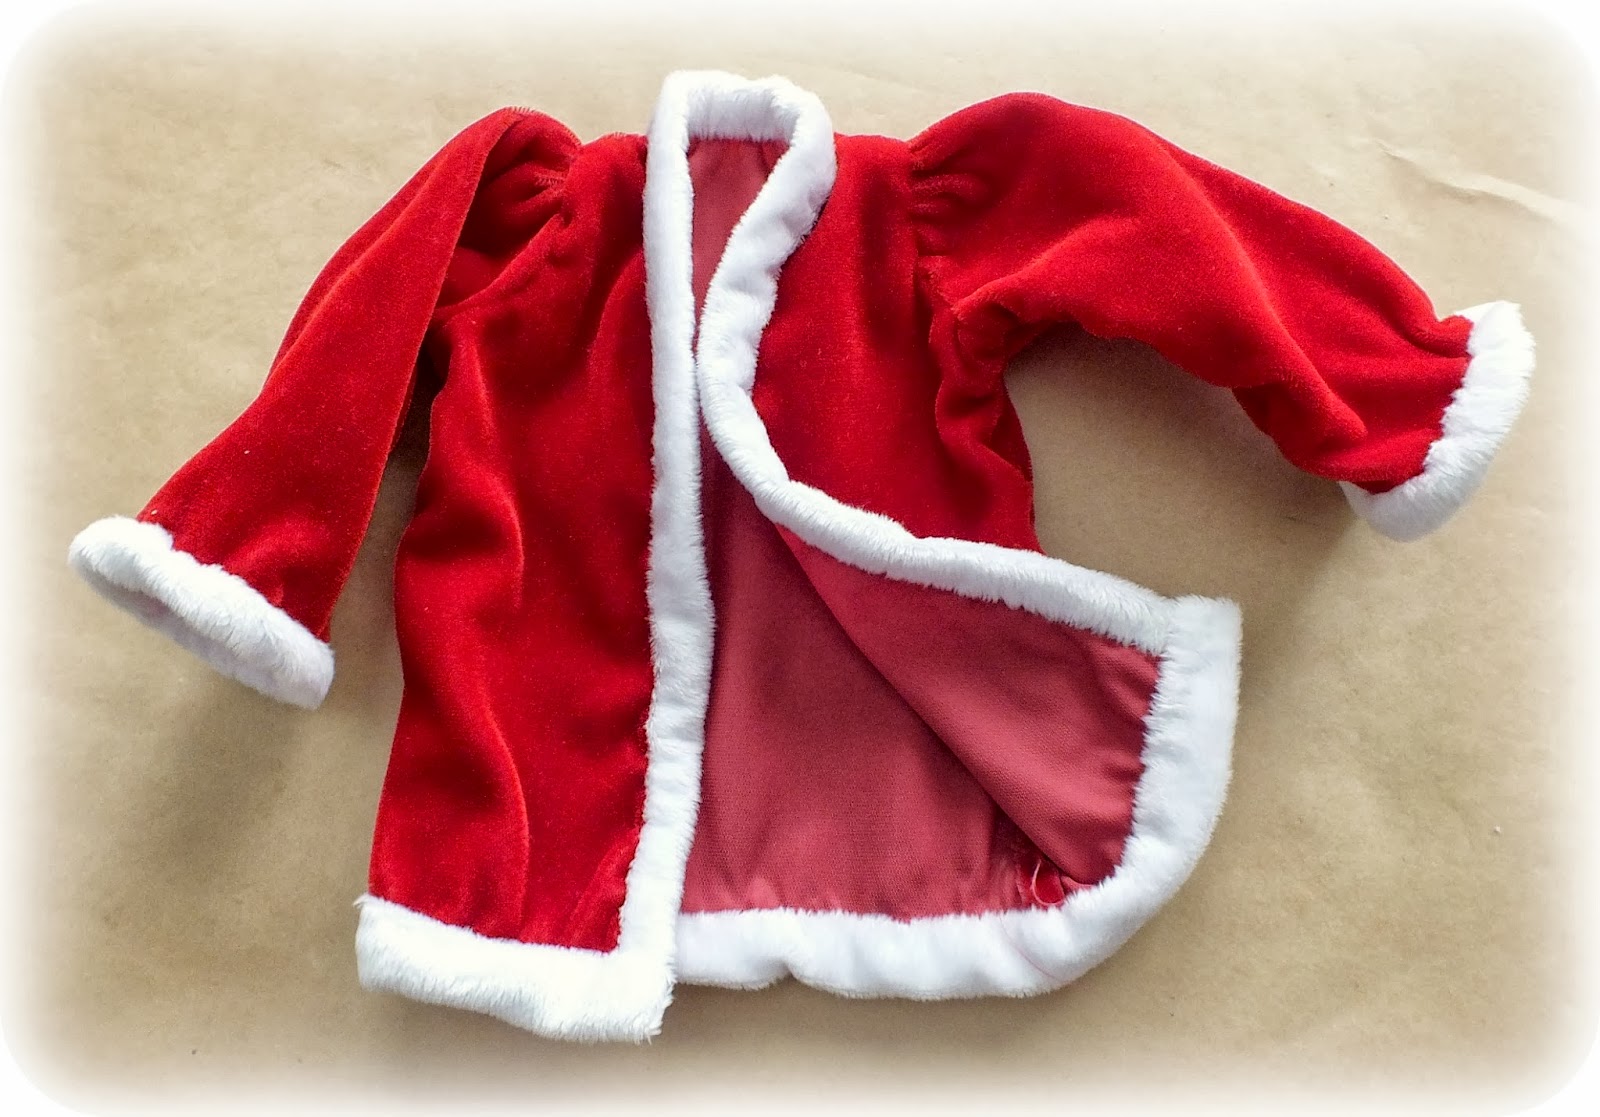
Father Christmas' Cloak

 
Here is the last of our Santa's Wardrobe patterns. The instructions for this fully pose-able STAEDTLER Fimo Puppen Santa can be found in the December 2013 edition of PolymerCafe magazine. Pick yours up by following this link.


I used exactly the same pattern as I did for Santa's Shirt and Santa's Short Jacket to make this cloak.
I lengthened the front and back bodice pieces so the cloak would reach the top of Santa's boots. I also added a hood to the coat. I measured around the neckline of the jacket and up and over Santa's head from one shoulder to the other to get the measurements for the hood. I added the hood pieces before I trimmed the cloak with fur using the same technique as the short jacket and cap. 

I also added a great deal of trim embroidery around the border of the piece. I used DMC floss with some glittery accent floss mixed in. I also added some green and red seed beads to the embroidered edges for some more glitter. I found teeny jingle bells to use a buttons and added those up both front edges to finish the piece off. 

Wishing you and yours the happiest of holidays. 

Wednesday, November 20, 2013

Deer and Spaceman Iron on Transfer Portrait Dolls

This is a very special couple. They are expecting their very first baby. Mom to be is very DEER to us (Huh, See what I did there?), and although we are still getting to know Pop, I think he's a pretty fantastic kind of person too. We simply had to do something to commemorate the event. We decided on Mom and Pop dolls for the baby. These dolls are fully washable and all parts are firmly sewn on for the baby's safety.  Iron on transfer paper for T-Shirts was used to make fabric replicas of the smiling faces new parents to be.

Tuesday, November 5, 2013

Santa's Short Jacket

Here's The short jacket pattern for our STAEDTLER Fimo Puppen Retro Santa featured in the December 2013 issue of PolymerCafe magazine. You can find the rest of the patterns by following the link in the sidebar.

We used the same pattern for the jacket as we used to make the shirt. Following the steps in the shirt post here, will help you to draft a jacket pattern if that's all you need.

Friday, November 1, 2013

Santa's Cap

Here's another clothing pattern for our STAEDTLER Fimo Puppen Retro Santa featured in the December 2013 issue of PolymerCafe magazine. You can find the rest of the patterns by following the link in the sidebar.


Tuesday, October 22, 2013

Santa's Trousers, Pattern and Instructions

This Santa is created with STAEDTLER Fimo and Puppen Fimo and is featured in this winter's PolymerCafe Magazine. 
As promised in the issue, here are the instructions a pattern for his trousers. His jacket, cloak and cap will follow with full tutorials of their own.

I'll help you through pattern drafting process as well as fitting the wee clothes to your doll.

Sunday, October 20, 2013

A Dress Shirt Pattern for Santa

This jovial fellow is created with STAEDTLER Fimo and Puppen Fimo and is featured in this winters PolymerCafe Magazine. 
As promised in the issue, here is the first of his outfit pattern posts.

I'll try to help you through pattern drafting process as well as fitting the wee clothes to your doll.
Please use the comments section at the bottom of each clothing post to ask questions. I'll be on daily to help you all through the process. 

I made the shirt pattern in the middle of my body construction. Before I added the head permanently. It's much easier to make the pattern and dress the doll without the pesky head getting in the way. Stretch the arms out sideways and lay the doll on some brown paper. Trace around the dolls body giving about a 1/4 inch on all sides to make sure there is enough fabric to wrap around the body. We'll add a seam allowance later.

Saturday, October 19, 2013

Our Retro Santa is a Cover Boy!

I know we're in the middle of Halloween preparations, however this couldn't wait!

I'm pleased as punch to announce that our Retro Santa made with STAEDTLER's Puppen Fimo has made the cover of PolymerCafe magazine for December 2013!

Follow the link to grab your copy and stay tuned to this blog to get step by step instructions on pattern construction to make his outfits. 

Yes there are two outfits!!
One long coat and hood for a Father Christmas 
and one cap and jacket for a traditional retro Santa Clause!

The shirt will be up next week and the other clothing items will follow weekly so you can have your own little classic Santa ready for the Holidays!

Thursday, March 21, 2013

Being Inspired

Thought I'd share some of the things that have been inspiring me this week.
Maybe they'll inspire you too.

Maggs is working on her very first stop motion piece. This is her very first character.
Look at that pouty little mouth! I can't wait to see what happens with this.


Teeny little twisted fingers.
Maggs is fantastic!
She's gathered my STAEDTLER fimo clay scraps and just started making things.....


Some grocery shop flowers.
They're probably dyed.....
But they're pretty and splotchy.

What do you think? Dipped?
I'm feeling some rose sculpting coming on.


Mercy's been working up a storm and living her dreams.
I'm truly inspired by her.
I'm a lucky Mom!
This photo was taken by the talented Mark Jarder
 Merc is wearing Dolce and Gabbana from Timeline Boutique.


And for those of you who have been following Crystal's progress......
Just look!
Here she is with a play date. 
They've been playing tug of war and romping through parks and water.
She's amazingly inspiring.

What or who inspires you?


Friday, March 8, 2013

Revisiting an Old Technique. Photo Transfer Portrait Dolls

These are some dolls I made and taught more than a decade ago. I used Lazertran transfer paper to put an image onto the unbaked STAEDTLER fimo clay and made these portrait dolls with the results.

This is my Grandma Maggie. 
I made this doll shortly after she died and I missed her (still do) terribly. 
She has been the angel for our Christmas tree almost every year since.
She's kind of a memento mori.
She offers little mental hugs when I'm feeling down.


She sits on a shelf in our living room the rest of the year. 
She's watching us and keeping us in check.
She would have NEVER worn a get up like this and I fully expect to pay for my transgressions when I see her again.
She has a full wire armature cotton wrapped body construction and is completely pose-able.


Here is the same thing done with a copyrite free postcard image.


I'm thinking it's time to remake this idea.