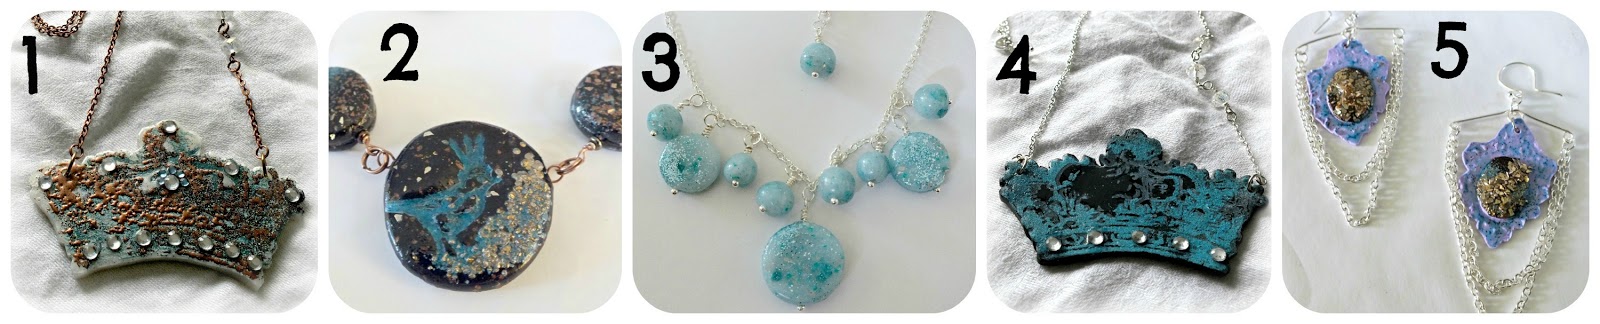
Showing posts with label Stampendous. Show all posts

Wednesday, January 17, 2018

Button Earrings

I've made some simple button earrings and pendant necklaces. They were so much fun to make. Hard to know when to stop! Thought I'd share the process for any of you who have some clay kicking around.


I gathered together some supplies that inspired me. I love these clear flexible stamps. They are meant to be used with a clear rigid stamp base, but they work very well without it on the polymer clay. I mixed up a batch of a pleasing colour and flattened it out to a 3mm thickness.


I dusted the stamps with cornstarch and stamped right onto the rolled out clay. I cut around the stamped images with a craft knife and tried to pair everything off. Some of the images I used a tiny round cutter on. These are my favorite pieces. Random patterns chosen without looking too closely. I really just tried to make sure I had two of each kind of pattern.


I dusted each piece with gold metal pigment powder before I baked them. After I baked and cooled the pieces I used a nail buffer to remove the gold powder from the high points of each design. I super glued earring backs right onto the back of each piece and poked them into apiece of cardboard to hold them still. I used some water based glossy varnish to shine them up and make sure the gold powder stayed put.


After the pieces dried I used my drill to make a small hole in the bottom of each piece so I could hang a bead or bead cluster from each earring. I also drilled into the top of each necklace piece to glue eye pins for hanging.


I had a bit of clay left over and decided some beads were in order. Now to figure out exactly what I'm going to do with these!

Monday, June 10, 2013

Sandy the Happy Crab, Beachy Trinket Box

I used STAEDTLER's Astrological Artist Mold to make this happy little crab box. The mold is heat and frost resistant and can be used with a heap of different mediums. I chose one of the new STAEDTLER fimo effect sorbet colours.

I think I may have to find some larger cardboard tubes and try this technique out on a bigger scale.


It sure was fun to make and it holds some of my beachy treasures. Teeny starfish and shells form the best vacation ever!

Here's what I used to make this project:

Tools I used to create this Crabby Box:
Empty toilet paper or paper towel roll
Craft blade
Clay roller
Parchment paper
Small soft round paintbrush
Water in a spray bottle


I rolled out the fimo clay to a 1/4cm thick and wrapped strips around the paper tube. A thicker strip is the base of the box and was about 4cm tall. The thinner band is about 2cm tall and will be the lid. Blend the seams where the clay meets by gently rubbing with your fingertips. Make sure all the edges are even and there are no fingerprints. Place the pieces on a parchment lined baking sheet still on the paper tube, and bake in a preheated 230 degree oven for fifteen minutes and allow it to cool before moving on to the next step.


Push the ends of the tube onto a sheet of 1/4 cm thick rolled out clay and use the craft knife to cut the circles out. Place a circle on each end and blend in the edge seams with your fingertips. Bake the piece again for another fifteen minutes and allow it to cool.


Mist some water into your STAEDTLER mold and press in an appropriate amount of clay to fill the mold. The water will act as a release agent. 


Remove the baked clay pieces from the paper tube and place the molded crab (or whatever shape you picked) onto the top of the box. Blend in the edges as before. Bake on parchment paper lined baking sheet in a preheated 230 degree oven for twenty minutes.


Roll out some clay to about 1/8th cm thick and cut a ribbon to go along the inside of the top of the base of the box. Blend in the bottom edge of the ribbon.


Mist some water into the smaller flexible mold and press in small amounts of clay to make the shapes.


Press the shapes onto the box and when you're happy with the positions, bake the piece again for another twenty minutes and allow it to cool.


Paint the fimo liquid onto the piece where you would like the sandy embossing powder to stick. Dust the powder over the wet fimo liquid and re-bake the pieces for ten minutes at 230 degrees.


Rub sme of the STAEDTLER chalks onto a piece of clean paper and dip your soft paintbrush into the glossy varnish. Pick up a small amount of the dusty chalk and paint colour onto the piece. Clean out your brush before you re-dip into the varnish so you don't put colour in the varnish pot. I think this is my new favorite way to add colour to my fimo projects.


I used the same technique to add some watery looking blue to the sand edges.


This was a blast to make and I really am hunting around for some shipping tubes to make a bigger version. I am smitten with the translucent cool watery look this clay has. 
Hope you give it a try too!


Sunday, May 26, 2013

Stampendous Glass Glitter and Mica Flakes in My Nails

Couldn't resist adding some of these glorious glitters from Stampendous to my gel nails.
Here are the results.


Full sun so you can see some of the sparkle.


In the shade.

If you don't do your own nails or aren't a licensed nail tech, you could certainly discuss taking these spectacular glitters into your local nail salon and have them added by your nail technician.


Sooooo sparklie!!

Stay tuned for the winners of our STAEDTLER Sweet Summer Giveaway with Stampendous early this week.


Friday, May 24, 2013

Overwhelmed.

I'm completely overwhelmed by the many talented designers who participated in this weeks STAEDTLER Sweet Summer Blog Hop and giveaway with Stampendous. We got to merge the wonderful products that these two companies offer and I had a blast playing.

Here's a list of links to the many fabulous blogs and their authors. I plan on keeping an eye on each and every one of them and am sure you'll want to visit too. (If I've missed any of the blog hop participants please let me know and I'll add you)


I'll be announcing the winner of STAEDTLER's Sweet Summer Giveaway early next week, along with three of my peeps who will have won some of the pieces I made for the hop.
I'm also flabbergasted by the wonderful comments I've received this week. I hope to see you all in the future.  I've got so many new projects planned for the next few months that I can hardly sleep and I'd love to share all of them with all of you.
You still have time to add a comment and join this site at the bottom of the page for a chance to win.
The comments will be open until midnight tonight.
Deadline extended until Sunday.
Here are some of the great "new to me" toys you'll see me playing with in the near future.
I'm a HUGE fan of the Stampendous product line. 

See you all next week!
Good luck!


Swing Bling Earrings

Last day of the STAEDTLER and Stampendous Sweet Summer giveaway Blog Hop.

Special Announcement!

We will be giving away one of the STAEDTLER Sweet Summer packages on Monday to a lucky reader who has joined in and commented on this weeks projects...
See the bottom of this post for details.

But there will also be three bonus giveaways!!!
I will be picking three names from the followers who have commented as a thank you to my peeps.
The prizes will be the finished jewelry sets you've seen posted this week.

and

Good luck and thanks so very very much for reading!

To complete this project you will need:
Clear ink pad
jewelry findings, chain, jump rings, lobster claw,head pins, 22 gauge wire, 

Tools you'll need to complete this project:
Home oven
Parchment paper
Water in a spray bottle
Rolling pin for clay use only
Craft knife
Medium grit nail file
Drill with fine drill bit
Three in one jewelry pliers, double round nose, flat and wire cutters.


Roll out your STAEDTLER fimo effect clay to a thickness of 1/8th of an inch and spritz with water. Stamp with the small cameo frame hard enough to make an impression in the clay.


Use a craft knife to cut away any un-stamped clay and a toothpick to make a hole in the top of each piece to later hang them. Bake the pieces in a preheated 230 degree oven for 20 minutes and allow them to cool. Load the small cameo frame stamp with clear ink and stamp the pieces again. I used Stampendous Detail Capri embossing powder on the clear inked pieces and re-baked them for ten minutes in the 230 degree oven. I allowed the pieces to cool again.


I coated the center cabochon of each piece with STAEDTLER fimo liquid gel and then sprinkled with a variety of Stampendous glitters and embossing powders. I re-baked the pieces again in the preheated 230 degree oven for ten minutes and let them cool.


They were interesting but I wanted even more bling.


I added a drift of STAEDTLER fimo liquid gel onto each middle section and sprinkled glass glitter onto the uncured liquid clay. I re-baked the piece a final time at the same temp for ten minutes and let them cool completely.


I used the jewelry findings and pliers to assemble the earrings. They're very swishy and will add a little pop of colour and glitz to my summer wardrobe. Seriously loving these products together. Hope you all get a chance to try them all out!

Don't forget to join this site by clicking the link at the very bottom of this page and leave a comment on this post for a chance to win this wonderful STAEDTLER Sweet Summer Giveaway collection at the end of the week.
Giveaway open to residents of Canada and the US only.

GIVEAWAY CLOSED!

 The “Sweet Summer” Giveaway includes the following:


Visit the other Blog Hop artists by following the links below for a chance to win a Stampendous gift too!
Visit and leave comments on this Friday's Blog hop posts for a chance to win even more:


Wednesday, May 22, 2013

Blue Glitter and Embossing Powder Meet Translucent Fimo

The Sweet Summer Blog Hop
With 
Continues!


Products used to make this project:

Jewelry findings, headpins, lobster claw, chain, jump-rings, 20 gauge wire, earring wires.......

Tools you need to reproduce this project:

Polymer clay rolling pin
Small circle cutters (mine are a 3/4 inch and a 1 inch)
Three in one pliers or... double round nose, flat and wire cutter pliers
Clay cutting blade
Parchment paper
Round tooth picks
Block of styrofoam
Soft round paintbrush
Plastic sandwich bag


Roll out the STAEDTLER fimo effect translucent clay to 1/4 inch thick and sprinkle the glitter and embossing powders onto the flattened clay sheet.


These glitters and embossing powders are gorgeous! I want to try them all mixed with my favorite STAEDTLER translucent clay.


Fold and re-roll the glitter into the clay over and over until it's dispersed throughout the clay evenly.


Sprinkle some Stampendous glass glitter onto the mixed glitter clay and re-roll and fold the clay again until you're happy with the mix.


Use the sandwich bag plastic to cover the mixed clay sheet and push the round clay cutter into the clay to make smooth edged rounded discs.


Sandwich wire between two of the smoothed mixed clay discs and seal the edge seams by gently smudging with your fingertips. The wire will make a hole for stringing the bead.


I sprinkled some glittery embossing powder onto one edge of each bead. I couldn't resist.


I rolled the extra clay into little balls and skewered onto a piece of wire. I baked all the beads in a preheated 230 degree oven for 20 minutes and allowed them to cool off before handling.


I removed the beads from the baking wire and put each bead onto the end of a toothpick and dipped them into the STAEDTLER gloss varnish.


I poked the other end of each toothpick into a large piece of styrofoam to dry. I came back after a few minutes and dabbed off the extra varnish drips.


After the beads are dry, load each onto a decorative head pin and make an eye using the three in one pliers.
Follow this tutorial if you need it.


These beads turned out spectacularly!
I love the STAEDTLER fimo effect translucent clay as a base for these glitters.


I added some chain to a couple ear hooks and linked some round beads evenly to these chains with jump rings to make some sweet dangle earrings.


I really love these beads!!!


I added a bead and a lobster claw to each end of a 20 inch length of silver coloured chain to make a necklace.


I hung the beads from the chain at even intervals. I started in the middle of the chain with the largest bead.


Don't forget to join this site by clicking the link at the very bottom of this page and leave a comment on this post for a chance to win this wonderful STAEDTLER Sweet Summer Giveaway collection at the end of the week.
Giveaway open to residents of Canada and the US only.


GIVEAWAY CLOSED!

 The “Sweet Summer” Giveaway includes the following:


Visit the other Blog Hop artists by following the links below for a chance to win a Stampendous gift too!

Visit and leave comments on this Wednesday's Blog hop posts for a chance to win even more: