Showing posts with label Christmas. Show all posts

Thursday, January 11, 2018

So Many Nails

So many nails!!!!
It's been a fantastic month. Heaps of new clients all with new nail art ideas. Here are a few of them. Too many to post them all. 

This was a transparent blue builder gel over top of some holographic glitter that was applied over a base of opaque blue gel. Love the depth this technique gives.


Some matte burgundy gels with a 3D gel brush sculpted rose.


A hand painted snowman with a few accent nails. Loads of snowy glitter and a sweater nail in grey.


Great set! Love doing marble! and who can resist matte black?


A hand painted feather with an embedded crystal.


These are some embedded shards of mica flake. Soooooo pretty!!!


A simple double stamped snowflake with holo glitter accents.


Chilly blue and silver with some 3D swirls in snowy matte.


Lovely sweaters.


3D swirls with blizzard glitter. Brrrrrrrrrr.....


Sweet pink set.


Natural nail polish mani. I love doing these.


A faded chrome over white with a 3D ring finger for textrue.


I was calling these ones Canadian winter. We did a glitter fade and a plaid with chrome tape.


These were my Holiday nails. a mauve ombre with snowy stamps.


More sweaters. This time with a metallic denim accent.

Black gel overlays with some rainbow glitter.


Some natural looking french extensions.


My glittery New Year Nails. Matte nudes over a glitter base edged in 3D white powder.


More pretty pink festive nails.
Hope these are a bit inspiring.
I'm tired now.....

Maybe I'll relax by painting more nails.
:D 

HAPPY 2018

Saturday, December 16, 2017

Well, That Didn't Go As Planned..... And a Bookmark Tutorial.

 I took last week off from the Salon so I could get some Christmas gifts made. We make almost everything. Usually we get a couple of purchased things but the  majority of our gift giving is home made. So.... I was all excited to start making..... And then..... The flu!!!

I'm almost caught up. We have heaps of things made (that I can't show you yet), but I have LOADS more to do. Mostly at the sewing machine. So I guess it will be between clients this week rushing to get it all finished. Really...... Every year I say I'll start earlier next year.....

Wanted to share this gift we made with Beastie.
It's pretty fast and easily made with things you probably already have in the house already.
Here goes...


Beastie Bookmarks:

You'll need:
Cardstock
colour printer
computer to manipulate photos
Photo of child reaching
Packing tape
sharp scissors small
white glue
Embroidery floss or string or ribbon
gauzy fabric
thread to match and hand sewing needle
bead


I took loads of pics like this. I had Momma Beast hold a string WAY up above Beastie's head and told her to reach for it. I wanted a shot that had her face up and arms up with a straight back. If you can get them to jump a bit for the string that works too.


I loaded the pic onto my PC and then onto a site called Picmonkey. Then I got rid of most of the background and made a frame around the pic. I flipped the framed pic so I could have a two sided bookmark. Then I printed it out in a couple of different sizes. Some folks like big books and some like little ones.


I cut out the images along the frame lines. This is helpful for keeping the images lined up. I glued the two mirror images together and let them dry flat. Once dry, I covered each side with some packing tape to make it more durable.


Then I cut those things out! I cut a tiny piece of fabric and gathered one edge with a running stitch and then I used the needle and thread to sew the tiny capes right onto the backs of the Beasties!


These are the beads that we made last year. We used FIMO Kids clay and had a HEAP of fun! I sewed a bead onto the hands of each bookmark using embroidery floss but you could use anything. Thread, ribbon, dental floss...... seriously! Whatever you have is great.
Beastie was thrilled with these!!! She wants to keep them all. I had to wait until nap time to put them up out of harms way..... I left her one so she could fly herself around the house like a tiny superhero.


We've been cookie baking too! These are the tiny tots creations. We added a bit more spice than the recipe suggested. We added cardamom and anise and ginger to the cinnamon and nutmeg. We also used a cookie mold shaped like an acorn leaving an indent in the middle of each cookie. Beastie wanted to fill 'em up with walnuts and chocolate. She is onto something here I think!!!


Wanted to share this recipe. It's from a very, very old out of print cookbook. Hope your Holiday plans are going smoothly and you're avoiding the flu!!!

Sunday, January 1, 2017

Christmas Sewing For Lily

 Hello There!
We've had an excellent Christmas here at our house. We were missing our oldest and my brother. We didn't get to visit with Mom and Pop Corner or the brother in laws either. 
It was very quiet this year. 
We decided in mid November that we should make all the gifts this year.....
If I ever utter that idea in any of your presences again in any month after July...... Just slap me!!!

We made the Baby Beastie soooooo many things!
This is her Super Beastie costume, made from pink lame....


She got a 1950's mini apron.


Foxy Jammies and slippers... 

(They match her Mom's baby doll jammies)


Sweet little mouse jammies and Monkey slippers.


A gnome jumper and silver dot blouse.


Reversible jacket.


So toastie warm!

Grandpa Jimmie's very first Christmas Make!
Lily's Weeee Stove!!!
She LOVED it!
Wouldn't open anything else after she opened this and had to make us all some "food"!


Hope you all had the Christmas that you wished for.
Looking forward to a bright and shiny new year with HEAPS of new adventures!


Sunday, November 27, 2016

Getting Ready For The Big Guy In The Red Suit

I found some time to make myself some toasty pants between Christmas present making.


We showed Lily how to make butter.


If you have the opportunity to try this with a kid, DO IT!!! Fill a mason jar 1/3 of the way with heavy cream and shake the heck out of it. keep shaking even when it feels like the contents aren't moving any more. Eventually it will make a loud sloshing noise as the solids (Butter) and liquids (Buttermilk) separate. That part always impresses. Then you can pour off the liquid and add salt and what ever flavors you'd like. We added rosemary.


Gave Mom a set of natural french nails. Her nails were pretty short. Just a sliver of white edge to build on. Natural looking nails are tough to make convincing.


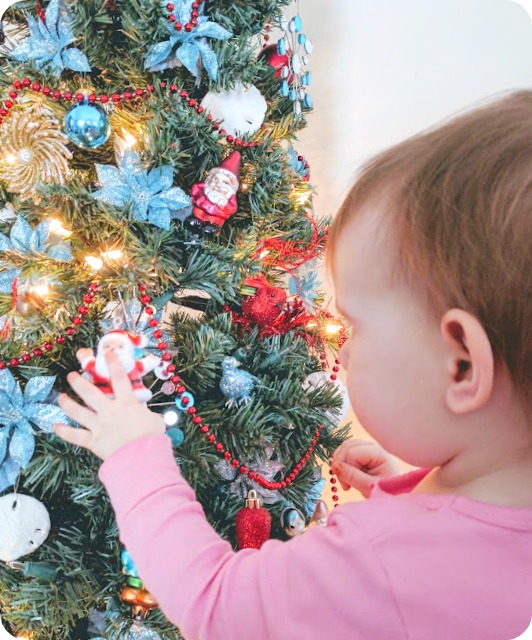
We had some amazing help placing our Santa and gnome ornaments perfectly.


Baby Beastie is totally loving this decorating thing. She wants to hold and examine every thing we put out. 

This is going to be the best ever Christmas yet!

Saturday, September 17, 2016

Baby Blob Necklace

Here is another great baby craft with STAEDTLER Fimo Kids clay.
These are going to make fantastic gifts!

This is how the mixed colour discs that lily made the other day turned out. In case you missed it, we just let her mix some Fimo kids colours together and we helped her roll them out into a sheet. We used mini circle cutters to cut out the shapes and then we pushed them all back together in an arch shape,
After the pieces were baked, we drilled holes in each end to hang the piece.


We varnished the front of the baked clay and after it dried added a chain, clasp and bead.


How fantastic are these!?!
They look like they came from a fancy designer shop!
Get on this folks!
Those mini humans at your house could be rakin' in the big fancy designer bucks too.
Or at the very least, building heaps of self confidence by making these really pretty gifts for their posse.

Wednesday, September 14, 2016

Thumbprint Heart Pendants

We made these really cute necklaces from the thumbprint hearts that Lily made with us the other day.

I LOVE the way these turned out!
They were way too easy to make.

You'll need:

one block of STAEDTLER Fimo Kids in any colour you'd like.
(we used the sparkly pink one!)
a small heart mold (optional)
baby powder as a mold release.
a few jewelry findings, jump rings, lobster claws, metal beads and bails, head pins
double sided 1/4 inch satin ribbon
a few 1/4 inch beads to dangle from the necklace backs
thread to match and a needle
jewelry glue


We kneaded the clay and pushed bits into the heart mold. We dusted the mold with the baby powder first to be sure the clay would pop out easily. 
If you don't have a mold you could just cut out little heart shapes with a craft knife from a sheet of clay. 
We helped Lily push her finger or thumb gently into each heart. We used a piece of wire to poke a hole into the top of each heart. Then we baked the hearts on a parchment paper lined baking tray in a preheated 230 degree oven for 20 minutes.


To assemble the pieces we glued in an eye pin to the holes we made in each heart, 
attached a bail with a jump ring, 
threaded an appropriate length of ribbon through the bail, 
added a metal bead to each end of the ribbon, 
folded each end of the ribbon through a jump ring and sewed the ends closed, 
added a bead of glue and pulled the metal bead up to the jump ring, 
connected a lobster claw to one end with a jump ring,
added a chain of five or six jump rings to the other end,
finished the piece off with a bead on a head pin.


They look pretty from the back too!

These will make great Christmas pressies from Lily!
Perfect way to carry on the tradition of home made gifts,
She sure is proud of these!