Showing posts with label FIMO AIR. Show all posts

Saturday, June 11, 2016

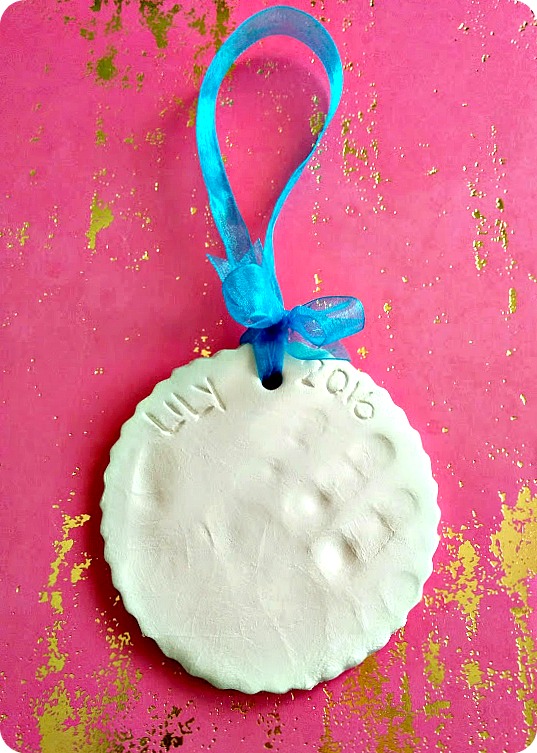
Air Dry Clay Hand Prints

We used some STAEDTLER Fimo Air Dry Clay to make these fun hand print keepsakes.

I LOVE THESE!!!


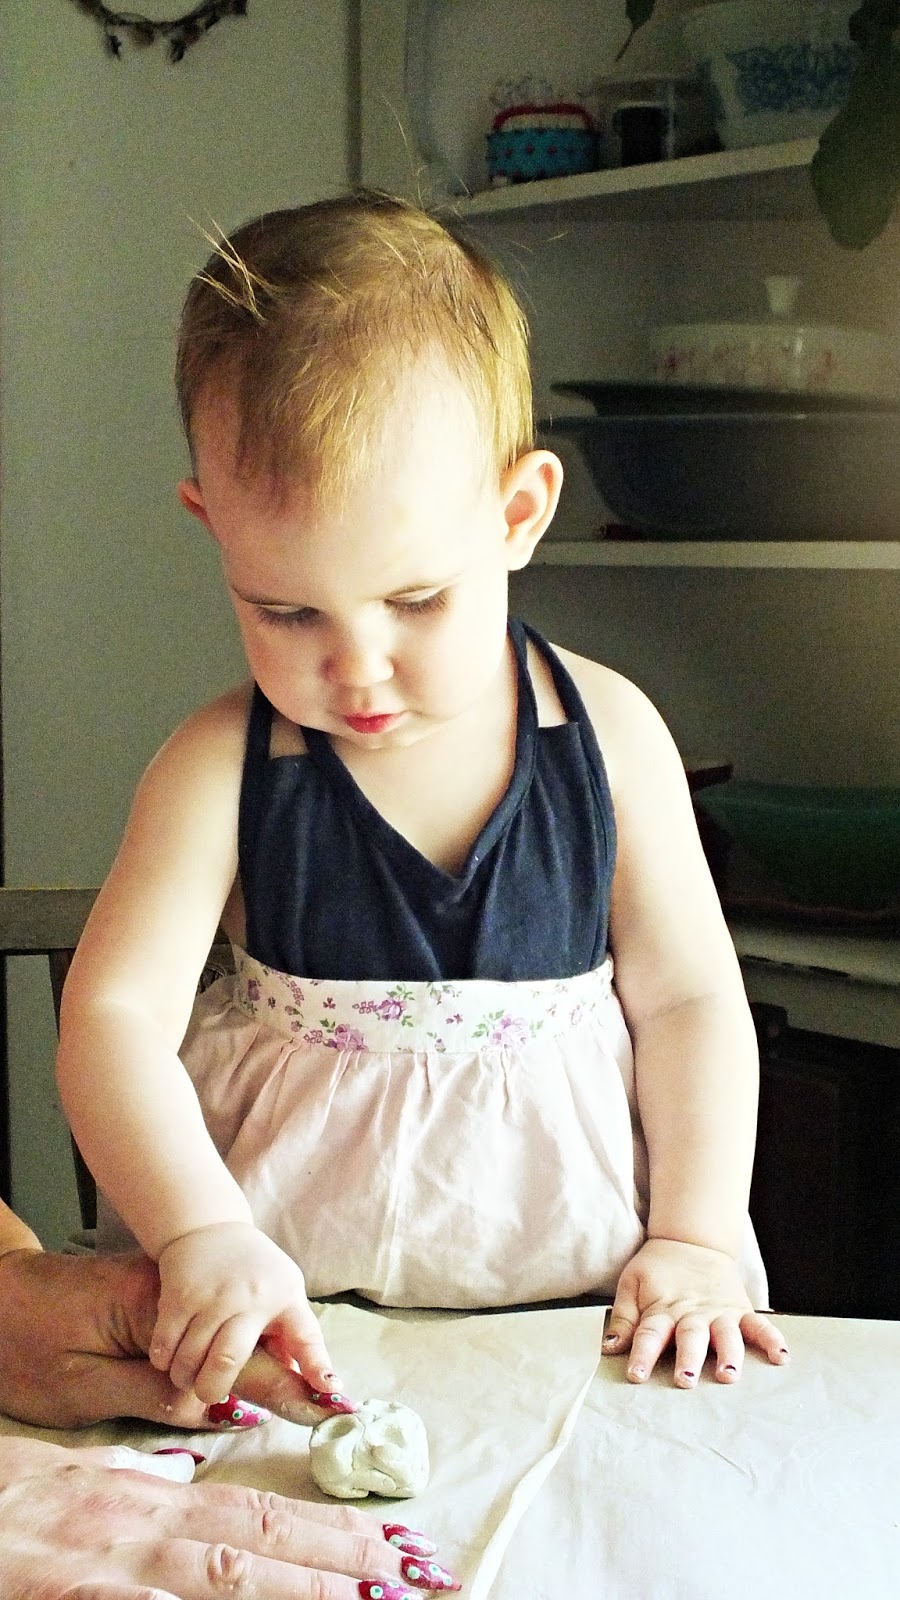
Lily really enjoyed pushing into the clay. We flattened the clay to about a cm thick and used a clay use cookie cutter to cut out scalloped circles. Then we had Lily push her hand onto each shape. We used a straw to cut a hole in each shape for hanging later. We let the discs dry overnight and then flipped them to dry another day.


Lily sure did enjoy squishing up the clay!

We'll definitely have to make more clay projects with the Lily Beast in the future.


Lily loves making things with Grandma, and Grandma loves it too!


Now all fifteen hand print tiles are off to Lily's house so she can paint them. Can't wait to see what colour she chooses for mine!

Monday, December 28, 2015

Computer Trouble

Unfortunately, my very good and faithful friend Lappy the computer has breathed his last breath. I'm awaiting a newly built computer to house his memories. Sorry for the brief post and my time away. We'll be back very soon with a new year full of fun projects and experiments.

Aunt Janet made us these BEAUTIFUL ornamnets this year and I had to share them with you.
The Santa is felted. Isn't he cute!!??

These are FIMO Air Light discs that have been stamped and coloured and coated with FIMO Deco Gel
Soooooo Pretty!

Happiest of Holiday wishes to you all.

Friday, November 13, 2015

Snowman Snow Globe Pendant


It’s cuteness overload. Create this mini snowman in a glittery water-world in just a few easy steps. The
package will make tons of these so you might want to have another idea ready for the rest of the clay. How
about some flat ornament shapes cut out with cookie cutters? Visit www.fimo.com for more project ideas.

materials:
 1 package FIMO air basic, 8100-0 white
Staedtler Lumocolor permanent marker, Black
 White rat tail or any thin smooth white cording
Aquarium sealant
Glycerin
Clear or white glitter
Mini glass bead vials or tiny jars emptied and cleaned
Orange seed beads
Wire

tools:
Double round nosed jewelry pliers with cutters

basic supplies:
Clear nail polish top coat, Distilled water (or previously boiled and cooled water) white glue

Wednesday, October 21, 2015

Little G the Goblin Bowl Featured in Craft Ideas!

We are pleased as punch that our STAEDTLER FIMO Air Goblin candy bowl 
has been featured in Craft Ideas.

It was a super fun and easy project!
Hop on over to CRAFT IDEAS and try it out for yourself!

Tuesday, March 31, 2015

Basic Bust Tutorial with STAEDTLER FIMO Air Basic

Here's a quick and dirty tutorial on how I made the bust of Mars.

Things you'll need:
Styrofoam block about an inch smaller than you want your finished piece
Plaster bandages. 1 or 2 rolls should do it.
1/2 inch dowel at least 2 ft long
5.5 x 5.5 x 7 inch block of wood for the base.
wood filler
vinegar
cooking skewers
wood primer
black mat spray paint
silver acrylic paint

Black felt

Tools:
1/2 inch wood drill
sandpaper rough, medium and fine grit
basic set of sculpting tools
craft knife
clay cutting wire or knife
paper towels
scissors
hot glue and gun
Spray adhesive
cling wrap
large flat soft paint brush


Start by filling any holes in your wood block. I dried my block out in the oven at 230 degrees for about 3 hours. It was in an outdoor wood pile before I found it and I needed it to be dry before I started finishing it. After the block filled with wood filler I sanded it with a rough sandpaper. I moved down to a medium and fine grit to finish the surface smoothly. I dusted the piece off and gave it a primer coat and let it dry. I roughly carved a head and shoulder bust shape from a hunk of Styrofoam using a craft knife. I paid attention to the recessed areas like the eyes and under the chin. I coated the foam bust with two layers of plaster bandage. I cut 2 inch lengths of the bandage and wet each one as I worked my way around the piece. I made sure to cover the whole piece except the area at the bottom where the dowel would be inserted. You can insert the dowel now but you might want to carve a point at the tip of the dowel to make it easier to insert it into the foam. Be careful not to come out the side of the neck. the armature had to cure so I set it aside for the evening.

Saturday, March 28, 2015

Completed Mars Bust From FIMO Air Basic

I promised to post pictures of the finished bust and here they are. I LOVE FIMO Air Basic. I like that I could wrap the piece and leave it to work on the next day. I liked the way it felt in my fingers.

I got some pretty awesome tips from my friends on the interweb before I started working on this piece. I think the most valuable piece of advice was to use vinegar on the final smooth out on the wet piece. It apparently changes the clay chemically and allows for a virtually crack free dry. I had some superficial cracking and filled those by coating the crack with vinegar and smudging more clay into the crack. I finished by smoothing more vinegar over the area and letting it dry again.

It's been a blast to get my fingers mucky.

Saturday, March 21, 2015

Progress Mars with FIMO Air Basic

Right now on the work bench.

Deadline looming! I have to let him dry as is. I could spend another 15 hours on him easily.


The helmet is pleasing. Came together pretty quickly too. This is three pounds of FIMO Air Basic.


Still many hours of tweaking and smoothing and adding detail. I'm using FIMO Air Basic, and I'm loving it!

Here are some of the progress pics for your perusal.

Still need a helmet and a smock. 
I promise to post finished project pics as I get them.

Happy spring!

Tuesday, March 17, 2015

More Squirrels (and other things)

The Fair Aisle Squirrel Vest is coming along swimmingly. Although I can only work on it for very brief bits of time between work and commissions, it's getting there. I have the pattern well worked out now and I think I'm pretty happy withe the results. Far Aisle knitting isn't for the instant gratification junkie in me, but I'm getting used to the slow progress and I'm beginning to love the workings of it.


Here's a bit of a sneaky peek of what's on my worktable right now. Getting very messy in the studio with some FIMO Air clay. This is my underlying structure. I can't wait to see if the picture in my head will make it out into the real world.

AND.......
There's some very exciting news of the GIVEAWAY sort coming up in the not so distant future so if you're a doll maker (or a want to be doll maker), you might want to click on the "Join This Site" button at the bottom of the page to make sure you get all the Make It With Me notifications. You won't want to miss this next giveaway!
It's going to be a good one!
I'm excited!!!


Saturday, December 20, 2014

Sand Dollar Ornaments with STAEDTLER Fimo Air Light

We made some pretty beachy sand dollar ornaments with STAEDTLER's Fimo Air Light.
They were so fast and fun to make that we wanted to share them with you for Christmas!


They're spectacular on our turquoise tree.


I made 2.5 inch discs of Fimo Air Light and thinned out the edges. Using the tip of an old pen I made five irregularly spaced holes around the edge of each disc.


I used the tip of the old pen again to etch a flower shape shallowly into the center of each disc.


I let the sand dollars dry for a day on some wax paper,turning them once while they dried so the backs would get some air too.


I painted to edges with white glue and added sparkles.


Some very thin metallic floss tied through one of the holes makes a very pretty hanger for these delicate looking sand dollars.

More to come before Christmas!!!
Hope you're all having a cozy season.


Wednesday, August 27, 2014

Samian Ware Pottery

La Graufesenque Site Archeologique Millau  was a dream come true. We knew there were Samian ware archaeological sites near La Cadenede in Millau where we were staying. We also knew that the odds of actually slipping away to explore one of these sights with just a week in the area, were slim. We not only got to the museum in Millau village center, but we also got an amazing tour of the actual dig site!

I'm still overwhelmed with glee!
There are a TON of pictures so brace yourself.

Here's a gorgeous piece of Samian ware from 100 - 200 AD. Not a reproduction! An actual intact piece from that time. Second to third century AD!!!! It's mind boggling! Our Canadian history is so very short in comparison. 


The wonderful Lady who worked at the site tossed this in our hands and said, "Ce n'est pas un cadeau." Or, This is not a gift. I think she knew I was just on the verge of happy tears the whole visit. I still can't believe she let us hold this beautifully restored piece of history. 

James and I are very big fans of Sir Tony Robinson's 
We've been dreaming about seeing an actual dig for years.

This is the dig site. It was excavated in the 1970's and has been maintained as a teaching site.
This is what we saw as we came out of the back of the old monastery where the site is located.


This section was an alter.


This long narrow channel brought water to the potters.


This was the kiln.


Here is a reproduction (with actual Samian ware) kiln. It was in the Museum at village center Millau.


This is why I LOVE Samian ware soooo much! These are stamps that were used to create consistent designs in the molds (next picture) they made to create the pots.


This is the inside of one of the molds made using stamps like the ones pictured above. I am seriously going to try to reproduce this technique in the very near future. 
How COOL is THIS?


This method of stamping and mold making, made it possible for them to reproduce unthinkable amounts of pots all with exquisite detail! These things can be found all over Europe.


Here is a batch they found in a midden or refuse ditch. They fused together in the kiln. It gives you an idea of just how many pots they were producing. 


This is a shot of the refuse pile. Billions of shards.


Even walking the paths entering the site had shards of pot mixed into the gravel. 


So much to take in!
This little guy helped explain things, along with Leslie and Patrick who we will be forever grateful to for taking us and translating for us. This was a bucket list event. I will never forget it.
Thanks for letting me share it with you.

Adieu!


Thursday, July 10, 2014

STAEDTLER Summer Giveaway!!!


You are invited to post a project you have made with any STAEDTLER product here on my blog
and you will be entered to win a

STAEDTLER prize package,

a $30.00 value.


 One winner will be chosen randomly on Thursday July 31st. 
Open only to residents of the US and Canada. 

Take a photo of your project and post it on any social media site with a brief description of the STAEDTLER product you used.

Write a comment with a link to your project photo on this post.

Make sure you mention what STAEDTLER products were used in your project 

and mention that you are posting for the STAEDTLER Summer Giveaway. 

We're looking for NEW projects made for this giveaway specifically. 

Projects must be posted no later than July 30th to be considered for a chance to win.


Prize package includes: 12 pc Karat Watercolor Crayons, 6 pc Triplus Fineliner Pastel set and 1 package of FIMO air dry clay. 

Posting a photo link in a comment below also allows STAEDTLER to re post your photo on their social media sites.

Can't wait to see your creative entries!

Tuesday, September 24, 2013

Halloween Watercolour

I've been playing with my STAEDTLER Karat Aquarell watercolour pencils. Thinking about some seasonal cards and decorations. Here's what we've got so far.

I'm thinking about table settings and maybe some pop up cards. 


The banners should be great for table settings, maybe scrawled across mini pumpkins? 


I have plans for pop up cards using this wing and some photo transfers on STAEDTLER fimo clay. 
I'll let you know what happens.
:D


Tuesday, May 28, 2013

STAEDTLER Sweet Summer Giveaway Winner!

And the winners are!!!!
(Why yes, I did make a drum roll sound with my lips.)


Isha Gupta 
won the STAEDTLER Sweet Summer Giveaway Prize featured above!


Yvonne Morentin won the Black Bird Necklace!


Chris Wooten won the Crown Necklaces!!


Girls please send me an email through my contact page so we can get your addresses and vitals for shipping.
YEAY!!!!
So happy to be able to share!